
The little list in my head now has another check! There were three things I wanted to make by the end of the year, I have succeeded in making two of them - graham crackers and now mozzarella cheese - the third will have to wait until I can really research the best cocoa beans.
If you aren't a cooker then the process of making mozzarella might be daunting. I am here to tell you it is SIMPLE. It takes about thirty minutes (give or take a few) from start to water bath. In the end you not only have something homemade, you also have a delicious ball of cheese!!
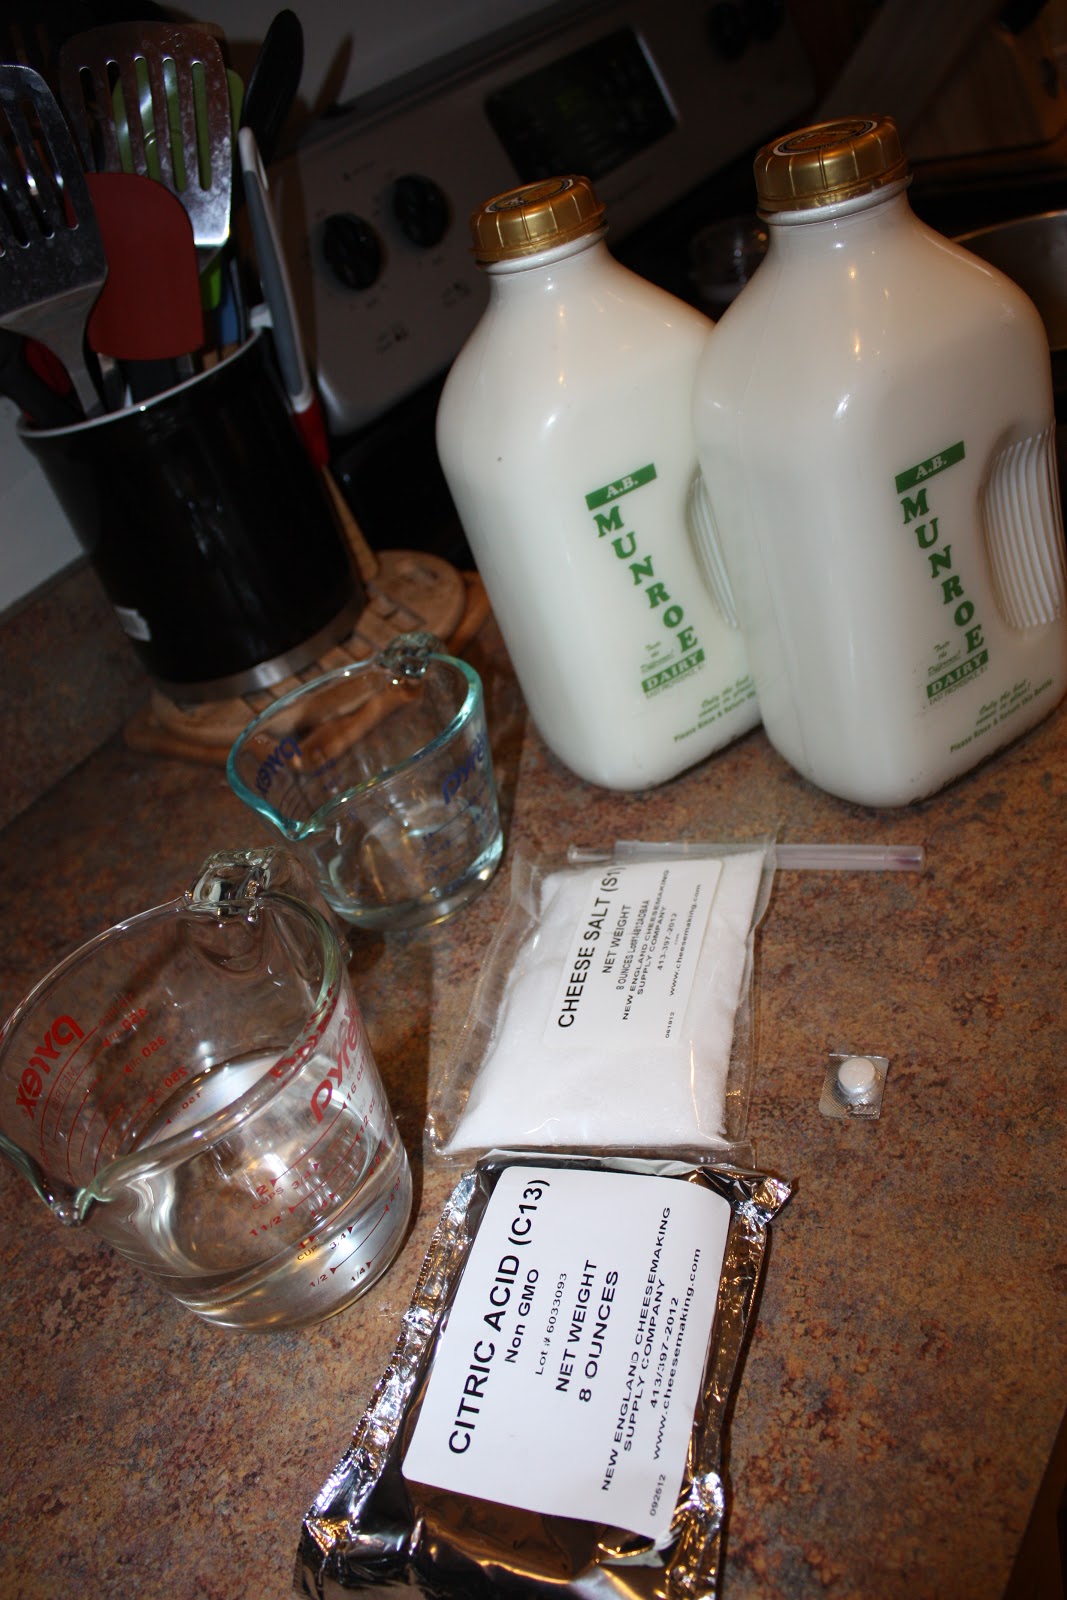
Tools/Ingredients
- 1 Gallon of Milk - it can be the fat content of your choice. Obviously whole milk would make a richer cheese however I used 1% and the cheese was still great! The one thing you HAVE to be sure about is the pasteurization process of your milk choice. In order to make quick and easy home made mozzarella you cannot (let me stress that again- CANNOT) use UHT (ultra-high temperature pasteurized or just ultra-pasteurized) milk. That milk you grab from the big chain grocery stores (Garelick, Hood, etc) is UHT. It gives the milk a great long shelf life, but it causes great loss of folate, B12, Vitamin C and Thiamin. It also makes creating quick yummy mozzarella at home impossible - curds will not appear no matter how much rennet you use! In our house we get our milk delivered from a local dairy. Their milk is gourmet pasteurized so obtaining milk was not an issue for me. I would suggest you try your local dairies if you want to attempt this recipe. Call around and ask what their pasteurization process is, most dairies are more than willing to discuss this with you.
- 1 1/4 c Water - if you live in a city that has a highly chlorine level in your water use bottled. Rennet and Citric Acid do not play well with chlorine.
- 1 1/2 t Citric Acid - You can find citric acid a bunch of places. First make sure you are buying FOOD GRADE. I have citric acid in the house for my soaps and lotions - that is not the stuff we want for our cheese making. Local brewery supply stores normally carry cheese making supplies, that would be where I would go if you don't want to purchase your supplies online (which is my suggestion).
- 1/4 Rennet Tablet (or 1/4 t of Rennet Liquid) - now for the "gross" part. For those of you that don't know, traditionally, rennet is a group of enzymes found in the lining of a calf's stomach that helps with digestion. If this thought bothers you, I suggest you don't look at those wonderful cheeses you buy from fancy stores! There are such things as "vegetable" and "microbial" rennet. (I use the microbial rennet which is actually made from a coagulating mold - this is fun stuff people!) If a person tries to sell you vegetable rennet that was commercially made call foul - there is no commercial source of vegetable rennet. It is normally locally made by people that know how to get the coagulating features out of figs and the like. Most vegetarian approved cheeses are made with microbial rennet. You can purchase this online where you get your citric acid. (I will give you a couple of links at the end of the post for all you people that don't like to peruse random sites.)
- Cheese Salt - not necessary at all, but it is cheap and it is a finer grade than regular old kosher salt. If you can't find any, but want something that will be that fine grade try some canning salt.
- A Pot/Pan - it must be big enough to hold your gallon of milk and still have enough room for some vigorous stirring. It also CANNOT be a conductive metal!! In other words, stainless steel, glass, or ceramic ONLY. For those of you that are going to ask, Caphalon pans are coated and therefore should be able to be used. That being said, the coating is only good if you have never used a metal utensil on it, scoured it, or it is less than about 15 years old. The coatings can wear away or get scratches.
- Dairy Thermometer- they are cheap and can be purchased with your rennet and citric acid. Please do not try to use a meat thermometer for making cheese!
- Colander/Cheese cloth/ Strainer - I, personally, use a cheese cloth however that does not mean you need to. They can be expensive and add steps upon steps to clean up. As long as you have a fine mesh on your strainer/colander you should be fine - and you will only need that if you too vigorously stir your rennet!
- Slotted Spoon - I really have nothing for this one - it is a staple instrument in every house :-D
- Knife - it needs to be long enough to cut through the curds to the bottom of the pan. SO if you are using a stock pot, don't pull out a 3 inch paring knife to get the job done.
- Microwave safe bowl - I am giving you the instructions for a quick and simple cheese making - and that requires heating in a microwave for stretching. You can do this with a water bath but it takes longer.
- Rubber Gloves - not necessary at all!!! I use them cause I am a wimp and that thin layer of rubber helps disperse the heat from the cheese during stretching so I don't feel as if I am melting my hands!!
 |
| Curds and Whey (I over mixed my rennet so they are flakey) |
 |
| Prior to microwaving |
 |
| Water Bath |
- Dissolve 1/4 of your rennet tab into 1/4 c of cool water. Mix gently and set aside.
- Dissolve 1 1/2 t of citric acid into 1 cup of cool water. Pour into your pot.
- Add your milk to the pot and turn the heat on med-medium high, stirring constantly and vigorously.
- Heat the milk to 90F
- Remove the pot from the heat and slowly stir in the rennet mixture. Combine using up and down motions for about 30 seconds. (If you stir the rennet mixture for too long you will end up cutting your curds as they form.)
- Cover the pot and DO NOT TOUCH for at least 5 minutes. (Rennet is a very gentle thing, it needs to be left immobile while it works or your cuds could be flakey.)
- After about 5 minutes check your curd. It should look like a custard or cheesecake consistency with a clear separation between curd and whey. (Whey should be a mellowly clear color, if it is milky recover and let it set for a few more minutes. If you did not get any curds, check the pasteurization of your milk.)
- Cut the curd with your knife, be sure to reach all the way to the bottom of the pot. Cut it in a criss cross pattern on a diagonal.
- Place the pot back on the burner and heat to 105 F. Slowly stir the curds while you are heating.
- Once you reach 105 F remove from the heat and continue to slowly stir the curds for 2-5 minutes.
- Strain off the whey - you can reserve it for recipes - and place the curds in your microwave safe bowl.
- Place the bowl in the microwave for 1 minutes. Remove and gently fold the curds into one piece - drain off the whey as you do this.
- Add in the salt to you preference, I use about 1 t, while you are folding the curds.
- Return the curds and bold to the microwave and cook for another 30 seconds.
- Drain and stretch the cheese. (Stretching the cheese is just that - pull on the cheese like you would taffy and fold it back in on itself. Keep doing this until the cheese is smooth and shiny. The cheese must be 135 F in order to stretch properly so if the last round in the microwave did not make it hot enough, pop it back in for another 30 seconds.)
- YOU HAVE CHEESE!! You can now form it into a ball, braid it, or make string cheese out of it. You could even roll it out and add some herbs or pesto. Whatever you do with it, you will want to finalize your cheese with a water bath. Submerge the cheese in a cold bowl of water for about 5 minutes followed by a bowl of ice water for 15 minutes. This allows the cheese to hold it's shape and protects it from getting grainy.
- ENJOY
 |
| Isn't that GORGEOUS?! |
I am a firm believer that once you have fresh cheese you will NEVER buy that horrible pre-shredded stuff in the refrigerator section of the grocery store again. If you try this, let me know if you believe that as well!
Links:
New England Cheese Making Supply - They have EVERYTHING you could need/want. They even sell kits!!
No comments:
Post a Comment