Showing posts with label Sweets. Show all posts

Friday, January 25, 2013

Iced Dark Chocolate Gingerbread Loaf

I seem to be on a gingerbread kick.  I have always loved molasses cookies (it is my favorite dough to eat!) but lately I have been more of a bar/loaf girl than a cookie girl.  This past holiday season I was completely obsessed with gingerbread bars, I prefer mine without the frosting but they are wonderful.  Seeing chocolate makes EVERYTHING better I figured I would try my hand at a chocolate gingerbread loaf.

I am posting this recipe because it is something different and it has been enthusiastically enjoyed by my sample-crowd (otherwise known as the teachers at Stinkles's school).  I, myself, am not impressed.  I think perhaps if I make it again I will use all oil and regular cocoa instead of dutch process.  Of course the change in oil will increase the calorie count.  I think I will probably just stick with the regular old gingerbread bars that I normally make.  If you try this one out let me know your thoughts.

Iced Dark Chocolate Gingerbread Loaf

  • 1/4 c Oil
  • 1/4 c Unsweetened Applesauce
  • 1/2 c Dutch Process or Dark Chocolate Cocoa
  • 1/2 c Molasses
  • 3/4 c Brown Sugar
  • 2 Eggs
  • 1/4 c Milk
  • 1 c Flour
  • 3/4 t Baking Soda
  • 2 t Ginger
  • 1 t Cinnamon
  • 1/4 t Cloves
  • 1/4 t Nutmeg
    • 1 c Confectioner's Sugar
    • 1 T Milk
    • 1/2 t Vanilla
  1. Preheat the oven to 325 F.  Grease and flour (I use cocoa instead of flour so you don't have a funny colored loaf due to the white flour) a loaf pan and set aside.  
  2. Combine the oil, molasses and brown sugar in a microwave safe bowl and microwave for about 1 minute.  Mix well to incorporate all the sugar.  Pour the mixture into you big mix bowl.
  3. Add in the applesauce, milk, soda, cinnamon, cloves, ginger and nutmeg.  Once the mixture has cooled sufficiently add in the eggs.  Blend well.
  4. Finally mix in the flour.
  5. Pour the batter into your prepared loaf pan and bake for about 30 minutes or until the loaf bounces back to the touch and a tested inserted in the center comes out clean.
  6. Remove the loaf from the oven and place the loaf pan on it's side to allow the loaf to cool slightly before removing it from the pan.  (By placing the loaf on it's side you are helping to ensure it does not stick to the bottom of the loaf pan.)
  7. Remove the loaf from the pan and place on a cooling rack to cool completely before icing.
  8. To make the icing, coming the confectioner's sugar, milk and vanilla.  If it is too thick slowly add in teaspoons of milk until the desired consistency is achieved.  Once the loaf has cooled completely pour the icing over the loaf and allow it to set.
  9. ENJOY
It really is a very simple recipe.  The calorie count comes in at about 160 calories per slice - if you slice your loaf into 18 slices.  Those are fairly thin slices, if you are looking more for a Starbucks slice thickness you are probably looking at about 320-350 calories per slice.  Everything in moderation, right?


I served the loaf with some cut up strawberries and a side of cool whip.  (In my opinion cool whip goes with everything, even if it is iced :-D)

Wednesday, January 23, 2013

Strawberry Honey Oatmeal Bars

THESE ARE SO AMAZING!!  I am a big fan of Trader Joe's Strawberry Cereal Bars and have been on the lookout for a great "cereal" bar recipe and these (though they don't look like cereal bars) taste very close!

I seem to be in possession of a surplus of oats - I can only make so many granola bars before I start looking for something new.  For a while now I have been contemplating a good oatmeal bar - not a cookie or a crunchy granola bar but a nice soft, cake-like oatmeal bar.  I had found a bunch of recipes for peanut butter/chocolate oatmeals bars, I was looking for something a little lighter on the calorie front.  Time to start frankenstein-ing some recipes - I have to say I am thrilled with the result!

Strawberry Honey Oatmeal Bars

  • 1 1/2 c Oats
  • 1 c Flour
  • 1/2 t Baking Soda
  • 6 T Butter or Margarine, softened
  • 1/2 c Brown Sugar
  • 1 Egg
  • 1/4 c Honey
  • 3/4 - 1 c Strawberry Spread or Jam (or the fruit flavor of your choice)
  1. Preheat the oven to 350 F and like an 8x8 baking dish with parchment paper.
  2. Blend together the butter, sugar and egg until light and fluffy.
  3. Slowly add in the honey, flour and oats and mix well.
  4. Press 3/4 of the batter into the bottom of the parchment lined 8x8 baking dish.
  5. Spread the strawberry spread (or jam) on top of the batter in the dish and top with the remaining quarter of batter.  
  6. Bake for 25-30 minutes or until the edges are lightly browned.
  7. Remove from the oven and allow to cool before cutting.
  8. ENJOY!
I cut these bars into 16 servings.  I ate mine while it was still warm and if I had extra calories for the day I would definitely be eating more!  They come in at about 140 calories per bar - not all that bad seeing they are so YUMMY.  Plus if you compare them to cereal bars they are right on target - most cereal bars fall between 130 - 180 calories.

It might not look like much but it is darn good!

Try them out and let me know your thoughts!

Monday, January 21, 2013

Paintbrush Cookies

Dinner is done, the toys are semi put away and Stinkle's is still bouncing off the walls - an hour before bedtime.  What to do, what to do?  It is cold, dark and snowing outside so that is out... I know - THWOMP cookies!  

As a little girl my mom used to make paintbrush cookies for my sister and I.  Every Easter we would cut out our egg shaped cookies and go to town decorating them before they are baked.  It is the quintessential memory of a wonderful time with my mom and sister in the kitchen.  (Keeping in mind memories can be changed to fit your current mood - if I was angry I am sure I would be remembering Heather and I bickering about one or the other stealing the color the other NEEDED.) 

As we all know I LOVE to bake.  Getting Brian and Stinkles involved is just icing on the cake for me.  So with an hour till bedtime it was just enough time to make and paint some cookies!  Seeing Stinkles is a Super Mario Fan (and I didn't feel like cutting Tie Fighters) we made Thwomps!

Paintbrush Cookies
These can be made with any sugar / shortbread / roll out cookie recipe.  I will give you my sugar cookie recipe but feel free to use your own!

  • 1/2 c Margarine or Butter, softened
  • 1 c Sugar
  • 2 c Flour
  • 2 t Baking Powder
  • 1/2 t Vanilla
  • 1 Egg
  • Dash of Salt
Let the painting commence!
  1. Preheat the oven to 400 F and grease your cookie sheets.
  2. Combine all ingredients except the flour and beat until fluffy.
  3. Slowly add in the flour and mix until a dough is formed.
  4. At this point you can chill the dough for a few hours or roll it out and bake it right away.  (I HATE chilling dough so I almost always roll it out and bake it - molasses cookies being the one exception to this rule.)
  5. If you aren't chilling the dough be sure to generously flour your rolling surface.
  6. Roll and cut out your cookies and place them on your prepared cookie sheets.  Be sure to leave enough room for the cookies to expand.
Paintbrush Cookies Paint
  • 1 Egg Yolk
  • Splash of Water (about 1 - 2 tablespoons)
  • Food Coloring of your choice
  1. Combine all the ingredients and mix well.
  2. Using a paintbrush*, paint your design on your cookies.
  3. Bake until the edges are golden brown
  4. ENJOY
Isn't that the simplest thing ever?  An hour of fun for Stinkles - between making the dough, rolling it out, cutting out the cookies, painting them and finally baking the cookies.  We killed the time before bed without making a huge toy mess and he got to make his own dessert!  I hope he looks back on his paintbrush cookies with as much fondness as I do on mine!!


We even made a Chain-Chomp and some Boo's

*I think it goes without saying that you need to use a CLEAN, USED ONLY FOR FOOD paintbrush.  I actually use cheap watercolor paint brushes that I buy from the dollar store or christmas tree shop for all my cookie and chocolate painting!  I put this in just incase I get an email later on saying "my cookies tasted a little funny, should I have not used that acrylic paint loaded paintbrush?"  

Sunday, January 13, 2013

Carrot Cake


Now I am not a huge fan of carrot cake. I think it goes back to my firm belief that carrots make you blind!! I know all you people are saying “no Amy, carrots are good for your eyesight.” Well let me give you my theory: I have loathed carrots from the day I was born. I would flatly refuse to eat them and when I was “forced” I needed to wash them down with a giant glass of milk. I have always had perfect vision. As a matter of fact I had never even been to an ophthalmologist until a few years ago and that was due to pregnancy issues. The rest of my family has been rabbit like in their love of the orange root vegetable. I think my mother would eat them with every meal if given the choice. THEY ARE ALL BLIND! OK not legally blind, but their eyesight left much to be desired. So let’s recap – Amy refuses to eat carrots and she is the only one in the house without spectacles. My ban on carrots continued until I had Stinkles, at which point I determined I needed to be a grown-up and eat the buggers. POOF, glasses for Amy. I would like to point out that I still have great vision, my glasses are for tint and to focus my astigmatism, but I can’t help notice the correlation between my carrot eating and the need for glasses.

OK back on topic, carrot cake. It seems like everyone likes it. I remember being younger and my Uncle was a chef at a local restaurant. I used to complain that everyone ordering carrot cake would get a cute little frosting carrot on their piece of cake but my plain old vanilla cake never had any decoration. Lucky for me, I was spoiled and he used to add frosting carrots to my vanilla cake!! I never understood why people would want a dessert that tasted like vegetables.

In keeping with my open mind attitude for the past year I decided to give Carrot Cake another try. This worked out excellent seeing Brian requested carrot cake doughnuts for his birthday.

My mother has a carrot cake recipe that I have always used so I cracked out the recipe and calculated the calories: 453/slice. AHH! That is more than I normally spend on my entire lunch. Obviously something had to be done. I sat down and racked my brain and came up with the following.

Carrot Cake
• 2 c Flour
• 1 t Baking Soda
• ½ t Baking Powder
• 1 t Cinnamon
• ¼ t Nutmeg
• 2 Eggs
• 1/3 c Brown Sugar
• 1 c Sugar
• ½ c Oil
• ¼ c Milk
• 1 t Vanilla
• 1 c Carrots
• Dash of Salt

Cream Cheese Frosting
o 4 oz Cream Cheese
o 1 ¾ c Confectioner’s Sugar
o 1 T Milk

1. Preheat the oven to 350 F and grease your pans. (This recipe can be made in a bundt pan, 2 8-inch layers, cupcakes, loaf pans – you name and it can do it!)
2. Mix together the sugars, oil, milk, eggs, and vanilla.
3. Add in the dry ingredients and blend well.
4. Finally add in the carrots and mix until the carrots are dispersed evenly.
5. Divide the batter evenly into your pan(s) and bake until the edges start to golden and a toothpick inserted into the center comes out clean. (The recipe makes 18 cupcakes if you are so inclined to make cupcakes.)
6. Set on wire racks to cool.
7. While the cake(s) are cooling combine all the frosting ingredients and blend until smooth.
8. Once the cake(s) have cooled, frost and refrigerate until serving.
9. ENJOY!

Seeing doughnuts were requested, I made 6 doughnuts and 12 cupcakes. Therefore the servings size for this batch was 18. The calorie count came in at 230/serving with the frosting and 170/serving without. Compared with 453, I will take it! Please keep in mind if you make a cake you can always make the servings bigger or smaller.

I will now admit that I tasted the batter as well as the finished product. Like with most things, I enjoyed the batter a lot more than the finished product. That being said, I didn’t find the cupcakes to be all that bad. If I was going to make a habit of eating them, however, I would have to use buttercream frosting instead of cream cheese!

All in all I would say that these were a hit! They make EXCELLENT baked doughnuts –just the perfect amount of rise. (I use a Wilton doughnut pan to make my baked doughnuts, it is a great buy for when you want something sweet and want to shake up the standard cupcake/cake format!)

If you give them a try let me know your opinion!

*Sorry for the EXTREME wordiness of this post. I wrote it on a plane and I guess I let my rambling nature take over!


Thursday, January 3, 2013

Gingerbread Bars

My new obsession!

Forget those gingerbread men, I am all about gingerbread bars!  They are moist, they full of flavor and they do NOT require rolling and cutting prior to baking - woo hoo.  Now I am a fan of molasses cookies (what some others might call ginger snap cookies - though I don't get why seeing there is more molasses than ginger but, I digress) and these bars have all the best parts of a molasses cookie!  They are super simple to make, the only draw back is they are just as simple to eat!  They aren't exactly the most calorie friendly food I have made - everything in moderation!  I prefer mine without frosting, but I am going to give you everything and let you decide!

Gingerbread Bars (or Molasses Bars as I am going to take to calling them)

  • 1 c Sugar
  • 3/4 c Butter or Margarine, melted
  • 1/4 c Molasses
  • 2 c Flour
  • 1 Egg
  • 2 t Baking Soda
  • 1 t Cinnamon
  • 1/2 t Ginger, ground
  • 1/2 t Cloves, ground
  • dash of Salt
  • 4 oz Cream Cheese, softened
  • 2 T Butter or Margarine, softened
  • 2 c Confectioner's Sugar
  • 1/2 t Vanilla
  • 1-2 T Milk
  1. Preheat your oven to 350 F.  Grease a 9x9, 11x7, or 9-inch pie plate and set aside.  You can also make these in a jelly roll pan, just be sure to grease whatever pan you choose.
  2. Combine the melted butter, molasses, and sugar.  
  3. Add in the egg and mix well.
  4. Finally add in the flour, baking soda, ginger, cinnamon, cloves and dash of salt.  
  5. Pour the batter into your prepared pan and bake for 20-30 minutes.  **It seems that every time I make these bars it takes a different amount of time to cook.  You want to cook the bars until a toothpick inserted into the middle comes out clean.  The bars climb the sides of your pan and the sides will be done before the middle.  Also do NOT be alarmed if they "sink" if you are not using a jelly roll pan.  They still taste wonderful!!
  6. Set the bars aside to cool slightly.  Once cool to the touch place in the refrigerator.
  7. To make the frosting combine the cream cheese, 2 T of butter, confectioner's sugar, vanilla and milk.  Mix well until fluffy.  Spread over the bars and return the bars to the fridge.  
  8. Allow the bars to cool completely in the refrigerator before cutting.  They also need to be stored in the fridge due to the cream cheese frosting.
  9. Enjoy!
I have to say that they so sink.  I bake them in my 10 inch stoneware pie dish.  The middle is never gooey and oozing, but they do sink down when you remove them from the fridge.  No worries, you can frost the middle and serve like a pie!

Like I said earlier I prefer mine without the cream cheese frosting, just a light sprinkle of confectioner's sugar and I am all set.  They are super addicting!!  When I cut them into bars I can get about 24 bars out one recipe.  With frosting that gives you a calorie count of 165 per bar.  I warned you they weren't the most calorie friendly things in the world!  If you omit the frosting you are looking at about 110 calories per bar.  Make them to share with some friends so you aren't stuck eating them all and you will be good!

Thursday, December 27, 2012

Baked French Toast

I hope the holidays have treated you (and your waistline) well.  This year we had my in-laws to our house on Christmas morning, in a new tradition of switching off every other.  As you should know by now, I couldn't let people come to the house and not have some sort of yummy dish to offer them!  I wanted something that would be "treat" like yet not TOO bad on the calories due to our overindulgence from the night before.  Brian and I threw around the idea of pancakes or waffles and then hit on french toast - we were thinking the cinnamon swirl french toast of course.

Being that it was Christmas, however, I didn't want to have to spend all that time flipping bread and not getting to eat with everyone or see all the presents.  So I researched.  My mother makes a french toast bake that people claim is pretty good, I have always avoided it cause it contains cream cheese and I am not the biggest cream cheese fan.  I compiled a bunch of recipes and started adding up the calories.  I could not believe just how calorie intensive most of those recipes were.  I would have spent 3/4 of my DAILY calorie intake on one serving of most of the recipes and the rest would have been well OVER my calorie intake.  I was floored.

By this time I had my heart set on a yummy french toast bake that would allow me enough calories, fat, and carbs to partake in clams casinos and a steak for dinner.  If I could find one I would have to make one - I took parts of recipes and cut back on the incredibly artery clogging ingredients and came up with something that was, in my opinion, reasonable.

Baked French Toast

  • 1/2 c Margarine of Butter, melted
  • 1/2 - 3/4 c Brown Sugar
  • 12 Slices Texas Toast
  • 4 Eggs, beaten
  • 1 1/2 c Milk (I used 1%)
  • 1 t Vanilla
  • 1 T Powdered Sugar
  • Cinnamon and Sugar, mixed*
  • Butter Spray*
  1. Mix the melted butter and brown sugar well.  Spread the mixture onto the bottom of an 11 x 17 baking dish.  
  2. Combine the eggs, milk, powdered sugar, and vanilla - mix well.
  3. Lay 6 slices of texas toast on top of the butter sugar mix. 
  4. Pour half the egg mixture evenly over the toast.
  5. *Lightly sprinkle the soaked toast with cinnamon and sugar
  6. Place the remaining 6 slices of texas toast on top and even pour the remaining egg mixture over those slices.
  7. *Lightly sprinkle the tope with cinnamon and sugar and a light spray of butter.
  8. Cover and place in the refrigerator over night.
  9. The next morning, preheat the oven to 350 F.  Remove the bake from the fridge and set on the counter for about 10 minutes.
  10. Bake, uncovered, for 40-50 minutes.
  11. Sprinkle lightly with powdered sugar.
  12. ENJOY
*These ingredients and steps are not needed - you can omit them, yet they do not add many calories and I think they enhance the final product.

I divided the recipe into 8 servings - which was a fairly good amount.  You could always divide it into 6, however I feel those would have been too much.  Most french toast bakes say to serve with warm syrup, I have to admit that I ate mine without any syrup though I did offer syrup and cool whip to those that would like it.   Without syrup or cool whip, divided into 8 servings the bake comes to about 360 calories per serving.  Not bad at all compared to 1000 - 1700 calories per serving that all the other ones were coming boasting.  (If you want larger servings and decide to go with 6, the calorie count rises to about 485 calories per serving - still much less than the others!!)

The bottom of this bake produces a nice sugary/crunchy base and the toast is a perfect blend of moisture and crispness.  I love french toast - much preferred over pancakes or waffles - and this is a recipe I will definitely be making again.  It is super easy to whip up and very yummy to eat!  It was delicious on Christmas morning, served with ham for that brunch feel!!

Sorry about the lack of pictures - I completely spaced on taking any while I was preparing or eating.  I promise to take some the next time.

Monday, December 17, 2012

Cinnamon Swirl Bread

Making bread makes me happy!  I like all sorts of bread - when I was little I used to eat Cinnamon Swirl Raisin bread all the time.  Recently I have been on a peasant bread kick but today I was in the mood for a sweet bread.  Thus the Cinnamon Swirl Bread was rising as of 9am this morning!

The recipe is simple - in bread terms - and yields a very yummy tasting loaf!  

Cinnamon Swirl Bread
  • 2 1/4 t Yeast
  • 3 1/2 c Flour
  • 1/2 c Boiling Water
  • 3/4 c Cool Water
  • 2 T Oil
  • 2 T Honey
  • 3/4 t Salt
  • 1 Egg White
  • 1/2 c Sugar
  • 1 T Cinnamon
  • Butter for the Pan
  • Extra Oil
  1. Combine the flour and yeast in a bowl.  
  2. Combine the boiling water and cool water.  Add the water, honey, oil and salt to the flour and yeast.  Mix with a dough hook until a dough ball is formed - you can add up to 1/2 c more flour if needed.
  3. Turn the dough out on a lightly floured surface and knead gently until the dough is elastic.  Return the dough ball to the lightly oiled bowl.  Roll the dough around in the bowl to coat the dough.  
  4. Cover the bowl with plastic wrap and place in a warm dry spot to rise.*
  5. Allow the dough to rise until it has doubled in size (about an hour).
  6. Prepare your loaf pan by buttering and set aside.
  7. Preheat the oven to 350 F
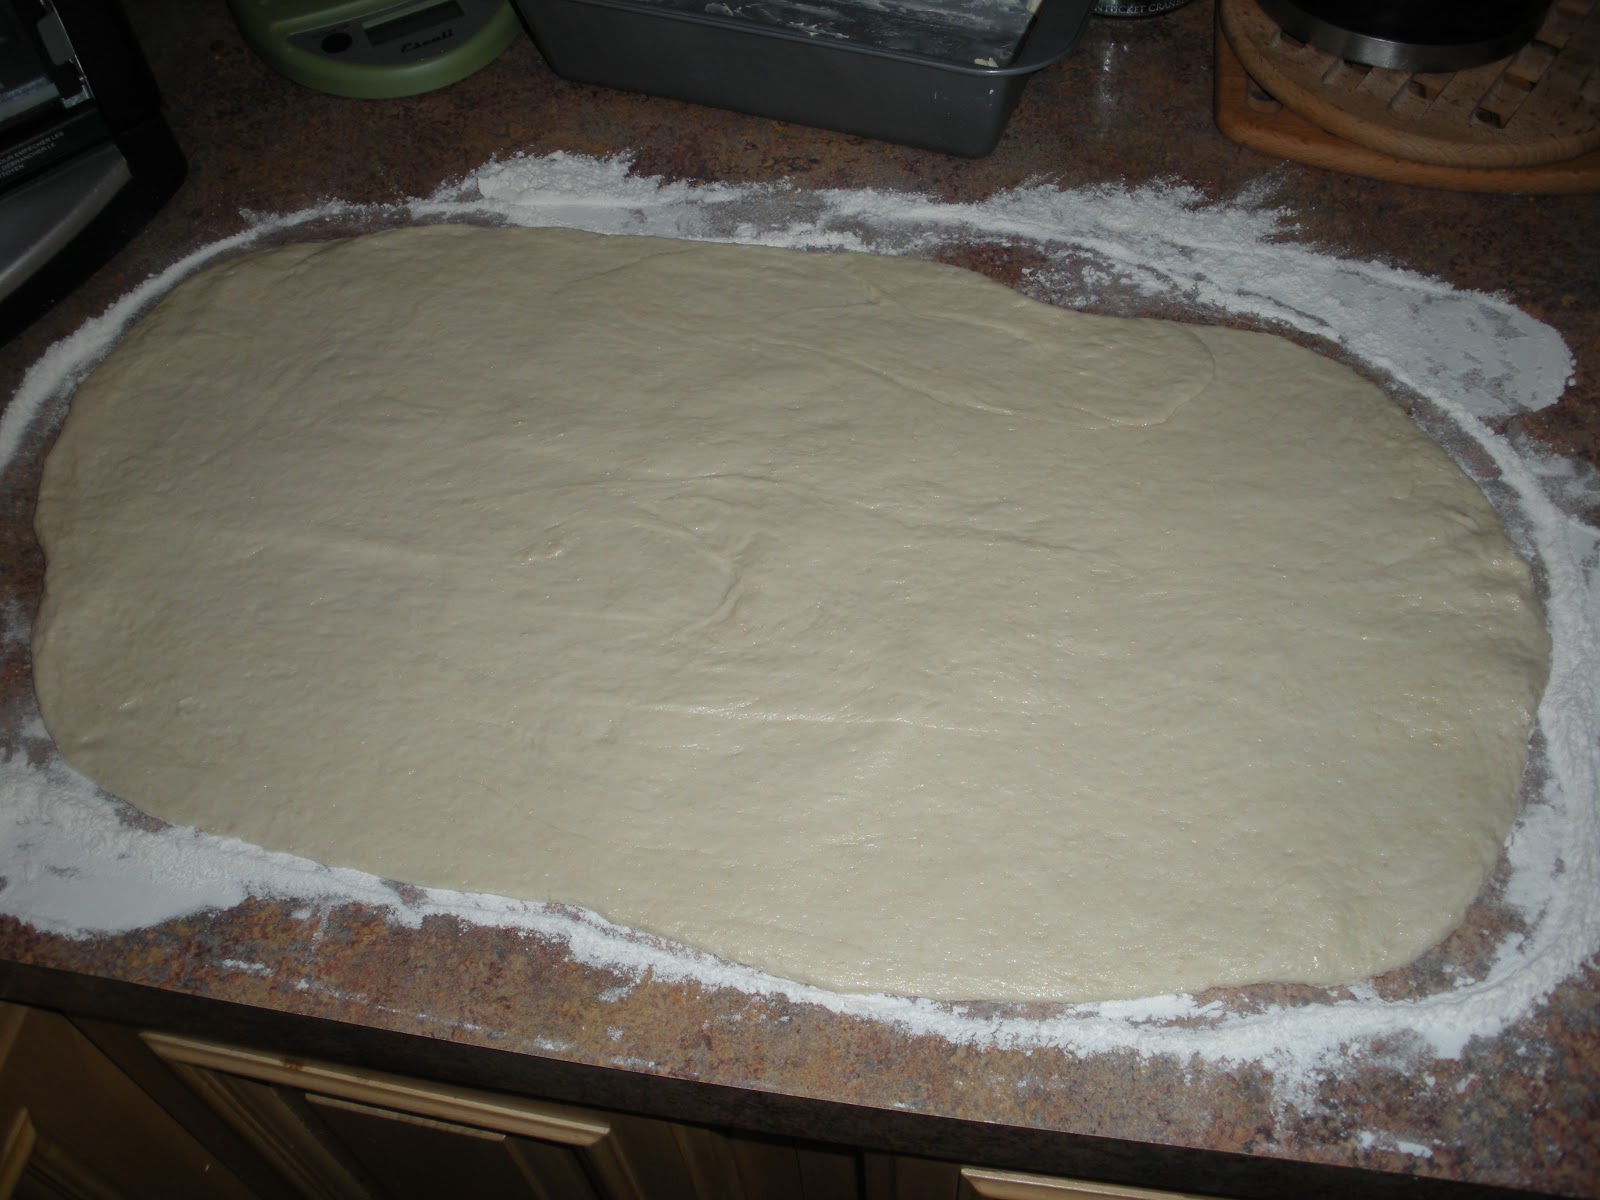
  8. Once the dough has risen, turn it out on a slightly floured surface and roll out into a rectangle roughly the width of the loaf pan.
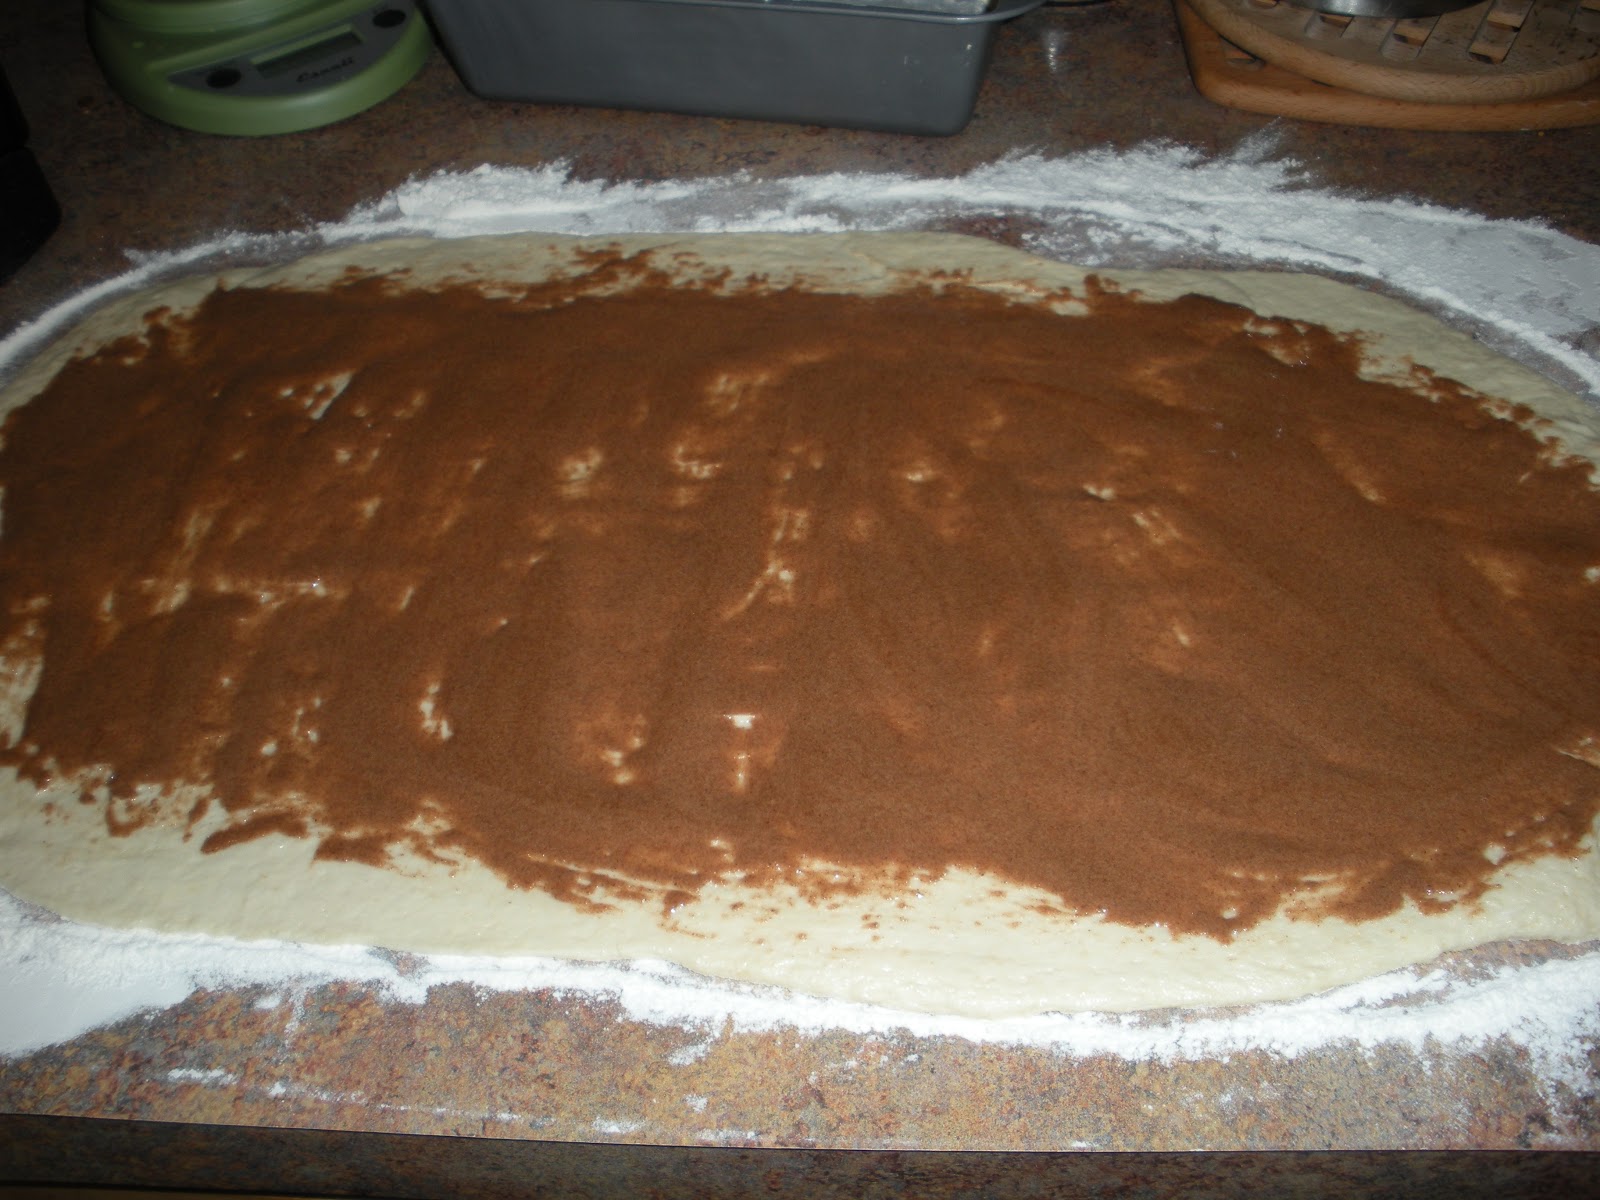
  9. Mix together the egg white, sugar and cinnamon.  Spread the mixture on the dough rectangle evenly.
  10. Roll the dough and pinch the seams and place the roll into the buttered pan, seam side down.
  11. Cover the loaf pan with a clean towel and allow to rise again for 30 minutes.
  12. Bake the loaf for 25-35 minutes until golden brown.  
  13. When you remove the bread from the oven, set the pan on it's side for a few minutes until you can transfer the loaf to a cooling rack.
  14. ENJOY!!!
This recipe makes a fairly large loaf that I was perfectly able to cut into 20 slices making each slice about 110-115 calories.  The bread is VERY YUMMY!!  Try it and let me know your thoughts!  I am thinking I want to turn mine into french toast!!!


Update:  This bread makes GREAT french toast.  I am a french toast girl, I will always pick it over waffles or pancakes.  Nothing beats homemade french toast with a touch of butter and some maple syrup!  This morning I made cinnamon swirl bread french toast - no butter or syrup needed.  We ate it right out of the pan as is and boy was it scrumptious!  If you make the bread and are a fan of french toast be sure to whip up a batch, you won't be disappointed!

Chocolate Peanut Butter Cookies

Every year my mother hosts a cookie swap.  Each attendee brings 8 dozen homemade cookies and after much food, laughter and hilarity the cookies are swapped!  I have been attending these for years - not that I need the dozens upon dozens of cookies that result from the swap, but cause they are great.

Each year I go through the same process: WHAT DO I MAKE?  I normally bake two different cookies so I need 16 dozen cookies, but what ones?  This year it was determined fairly early on that I would make my oreos but that means I still need another cookie recipe for the swap.  I contemplated the banana oatmeal cookies I made last week, but they aren't as pretty as I would prefer.  Plus this is a cookie swap - no need for lower calorie cookies here!

Well I believe I have found it!  It combines the things I like most - CHOCOLATE and PEANUT BUTTER!

Chocolate Peanut Butter Cookies

  • 1 1/2 c Flour
  • 1/2 c Cocoa
  • 3/4 t Baking Soda
  • 1/2 Butter or Margarine, softened
  • 1 1/2 c Sugar
  • 1/2 c Peanut Butter
  • 2 Eggs
  • 1 t Vanilla
  • 3/4 c Chocolate/Peanut Butter Morsels, mixed
  • Dash of Salt
  1. Preheat the oven to 350 F.  Grease or parchment your cookie sheets and set aside.
  2. Cream together the butter, peanut butter, vanilla and sugar.  Add in the eggs one at a time and mix well.
  3. Add the remaining ingredients, save the morsels, and mix well.
  4. Finally stir in the morsels.
  5. Drop by rounded tablespoons onto your cookie sheets and back until they start to slightly crack.  **The cookies will look gooey still.  They set up once they start to cool.  Be sure to allow them to cool slightly on the cookie sheet before moving to a cooling rack.
  6. ENJOY!
Not only are they super yummy but they are easy - a necessity if I am going to make 8 dozen oreos for the swap!  The recipe makes about 48 cookies - if you don't eat too much of the batter :-D.  They aren't exactly the lowest calorie cookie, but with peanut butter in the name a low calorie dessert shouldn't be expected!  The calorie count comes in at about 85 calories per cookie.

Try them out and let me know your thoughts!


Wednesday, December 12, 2012

Banana Oatmeal Chocolate Chip Cookies

I am on a banana kick - in case you haven't noticed!  Well at least we are all getting our potassium - no leg cramps for us!  These cookies don't have that "crunch" of a cookie so if you are looking for that these aren't for you.  They are actually very fluffy and more cake-like.  Actually the consistency reminds me a LOT of the pumpkin spice cookies from earlier this year.

They are SUPER yummy despite the lack of crunch!  I enjoy oatmeal cookies - I just love the texture the oatmeal gives to the cookie - add in some bananas and chocolate chips and you have a keeper!

Banana Oatmeal Chocolate Chip Cookies

  • 2 c Flour
  • 1/2 t Baking Soda
  • 3/4 c Butter or Margarine, softened
  • 1/2 c Sugar
  • 1/2 c Brown Sugar
  • 1 Egg
  • 1 1/2 t Vanilla
  • 1/2 c Mashed Banana - about 1 large banana
  • 1 c Oats
  • 1/2 - 1 c Chocolate Morsels
  1. Preheat the oven to 375 F.
  2. Cream your butter or margarine with the sugars and egg. 
  3. Add in the vanilla, soda, and banana.  Mix well.
  4. Slowly add in the flour and oats. Mix until well combined.
  5. Finally add the chocolate morsels - I like to mix them in by hand so they don't break up too much.
  6. Drop by rounded spoonfuls onto a baking sheet and bake until risen and slightly golden.
  7. Allow cookies to rest on the sheet for a minute or two before removing to a cooling rack.
  8. ENJOY
Just as simple as a chocolate chip cookie recipe!  This recipe made 4 dozen cookies - I can't tell you the last time I actually got 4 dozen cookies out of a dough, normally I eat at least 3-5 cookies worth!  They come in at about 70 calories per cookie - COMPLETELY WORTH IT!  In continuing my banana/peanut butter/chocolate obsession, the only way these could get better would be if they had peanut butter!  (Of course it could be as simple as adding in peanut butter morsels with the chocolate ones!)

Try them out and let me know your thoughts - I need to pick a couple cookies for our annual cookie swap and I just can't decide!


Friday, December 7, 2012

Double Chocolate Banana Bread

As evidenced previously I am a fan of banana bread.  It is yummy, filling and super easy to make.  There are a bunch of different recipes out there that can require a variety of ingredients, ranging from sour cream to cream cheese.  This recipe doesn't require anything random - all in house ingredients for this one.

Stinks call this his "chocolate cake bread" - I don't think he even realizes that it has bananas in it!

Double Chocolate Banana Bread
Check out that chocolatey goodness with peanut butter!

  • 1 c Sugar
  • 2 Eggs
  • 1/3 c Oil
  • 1 t Vanilla
  • 1 1/2 c Flour
  • 1/2 c Cocoa
  • 1 t Baking Soda
  • 3-4 Bananas, mashed
  • Salt - just a dash
  • 1/2 c Chocolate Morsels
  1. Preheat the oven to 350F and lightly grease 2* loaf pans.
  2. Combine the sugar, oil, eggs, vanilla and bananas.  Mix well.
  3. Add the remaining ingredients to the banana mix and blend well.
  4. Divide between the prepared pans and bake for 40-50 minutes or until a tester inserted in the middle comes out clean
  5. Allow to cool in the pan for about 5-10 minutes before transferring the breads to a cooling rack.
  6. ENJOY
This recipe produces a very fudge-y like bread.  I choose to create two "short" loaves instead of one giant loaf.  The recipe allows for either so it really is up to your discretion.  I choose two short loaves to cut down on the calories - I am able to cut the loaves into 24 equal slices which brings the calorie count to about 130 calories per slice.  All in all that isn't all that bad.  Now if I made one loaf I would cut the loaf into about 14 slices which would make the calorie count about 225 per slice.  I know the slices are technically "shorter" but my head gets just as full on a short slice as it does a larger one so I would prefer the 130 calorie slice.

This bread tastes AMAZING with a serving of peanut butter!  I am working towards blending my peanut butter banana bread and this chocolate one - to make a superior banana bread of course!  I will keep you posted.

Friday, November 30, 2012

Black Bean Brownies

Yup you read that right, BLACK BEAN brownies.  A few years ago I probably would have scoffed at anyone that said those three words together - but now I will pretty much try anything.  They aren't all that bad.  I think the recipe would go MUCH better if I had an actual food processor and not just a magic bullet.  I am going to have to write to Santa for one.  There is that after taste of black beans, but seeing I like black beans it doesn't bother me too much.  These would probably be even better with some frozen yogurt or even a dollop of cool whip.

The Black Bean Brownies are only about 70 calories less than a regular brownie however so I guess it all depends on your preference.  If you are looking for a brownie recipe that doesn't contain flour then this is for you.

Black Bean Brownies

  • 15 oz (1 can)  Black Beans, drained and rinsed
  • 2/3 c Sugar
  • 2 Eggs
  • 2 Egg Whites
  • 1 t Vanilla
  • 5 T Cocoa Powder
  • 1/4 c Butter or Margarine, melted
  • 1/2 c Chocolate Morsels
  1. Preheat the oven to 350 F and grease an 8 x 8 pan.
  2. Place all ingredients, save the chocolate morsels, in a food processor and process till smooth.
  3. Pour the mixture into your prepared pan.  Sprinkle the morsels over the batter.
  4. Bake for 30-35 minutes or until firm to touch.
  5. Allow to cool and ENJOY

The brownies are fairly fudge-y in consistence.  I sprinkled a shake of confectioner's sugar on the top as well.  I cut the recipe into 16 pieces which yielded about 120 calories per serving.  As I said earlier, they aren't bad but I am not sure if the calorie savings is big enough for me to forgo my old standby Hershey Brownies.

If you give them a try let me know your opinion!

Sunday, November 25, 2012

Turkey Day Favorites

I have at least three recipes that I want to share with you from Thanksgiving, but seeing they are all related I decided to do a "Thanksgiving Episode"!  We were fortunate enough to host this year for the Hubby's side of the family - there is no way my side would all fit in the house let alone have a sit down meal!  I was super excited!! Not only did I get to cook the turkey and ham, but I got to create some delicious side dishes and stage what I hope was a wonderful meal.  It seemed to go wonderfully so I am hoping to make our hosting into an every other year tradition!

Now for the recipes.

This year I decided to brine the turkey.  Now I have brined meats in the past with good success, but I have never brines a turkey.  Especially not for a main course holiday!  Of course I contemplated spending the $15/can on some Williams Sonoma brine but I just couldn't bring myself to do it.  I decided I could make my own based on my tastes and hope everyone else would enjoy it.

Turkey Brine

  • 1/2 Gallon Water*
  • 2 1/2 Tubs Veggie Stock* (*or enough bouillon/broth to make 1/2 gallon) 
  • 1/2 c Salt
  • 1/2 c Sugar
  • 1 T Rosemary
  • 1 T Sage
  • 1 T Thyme
  • 1/2 t Garlic 
  • 1/2 Gallon Cold Water
  1. Combine all ingredients save the 1/2 gallon of cold water in a stock pot.  Bring to a rolling boil and cook until sugar and salt are dissolved.  
  2. Remove from heat and allow to cool slightly.
  3. While the brine is cooling prepare your turkey by removing the innards and giving it a good washing.  Pat the turkey dry and place it in a brining bag or large pail - I use a brining bag cause space is limited in my fridge.
  4. Combine the cooled mixture with the 1/2 gallon of cold water, mix together and pour over the turkey.  
  5. Seal up the bag or pail and place in the fridge for approximately 1 hour per pound of bird.  
  6. Once the brining is complete be sure to RINSE YOUR BIRD THOROUGHLY or you will have a very salty tasting dinner.  
  7. Stuff and/or cook your turkey as you normally would - keeping in mind that brined birds tend to cook a little faster than non-brined.
  8. ENJOY
See, easy!  If you have a super large bird that the brine does not cover completely then you will have to flip it half way through the brining process (or simply double the recipe and use enough brine to cover the bird).  It produced a wonderfully tender and juice turkey with just the right hint of seasonings.  I was very pleased!  Forget spending $15 for a one time use can of brine mix - this will now be my go to for brining large birds!


The next recipe I am going to share is my stuffing recipe.  Now I grew up in a Portuguese family, which means that stuffing contained chourico or linguica.  Now Portuguese sausage is wonderful, especially with peppers, onions and some cheese on a roll, but it can be an acquired taste and I was cooking for non-Portuguese people.  (I should point out that I am not a huge stuffing fan to begin with, if I want to eat bread I am going to eat bread.  It doesn't have to be mashed and flavored :-D)  To that end I wanted to create a stuffing that still had the same principle of the stuffing I grew up with, but without the extra kick linguica would give it.  I give you:

Chicken Sausage and Herb Stuffing

  • 14 oz Wheat Bread (about 3/4 of a large loaf)
  • 2 T Butter or Margarine
  • 1 1/2 c Onion, diced
  • 1 3/4 c Celery, diced
  • 4-5 links Chicken Sausage (I used Italian flavored)
  • 2 1/2 - 3 1/4 c Chicken Broth
  • Sage, to taste
  • Thyme, to taste
  • Garlic, to taste
  • Salt and Pepper, to taste 
  1. Toast and shred the bread into a large bowl.  I have found this is the easiest way to dry out the bread, but you can also cube it and bake in the oven or leave out on the counter over night - though this method has been met with varying success.  Set the bowl aside.
  2. Remove the casings from the sausage links and chop into small pieces to facilitate crumbling.
  3. In a large fry pan combine the celery, onion, butter and sausage.  Cook on medium high heat until sausage is warmed through and celery is translucent.
  4. Add the sausage mixture to the bread bowl and mix well.  
  5. Mix in the spices to taste and slowly add the broth until the desired consistency is achieved.
  6. Transfer the stuffing to a lightly greased casserole dish.  Now you can either bake this dish now, or refrigerate the stuffing until Just before your turkey is done cooking.
    1. To cook the stuffing immediately you should preheat your oven to 375 F.  Cook the stuffing to 30 minutes, removed from the oven and mix gently.  Return to the oven and cook for another 20-30 minutes until golden brown.
    2. To prep the stuffing for future cooking just place in the fridge.  Remove the stuffing about 10 minutes prior to cooking to allow it to acclimate.  Seeing the stuffing takes about 1 hour to cook I find it is best to throw it in the oven during the last 20 minutes of the turkey cooking.  That way the stuffing will cook while your turkey is "resting".
  7. ENJOY
Again, easy!  Now stuffing is mostly bread so if you are thinking that it is a lower calorie food I am sorry to burst that bubble.  That being said this stuffing actually comes in not as high and one would have expected.  I divided the recipe into 9 equal servings - which for this limited stuffing eater was a BIG portion - and came up with about 175-180 calories per stuffing.  Not bad for chickeny bready goodness!


The final recipe I will leave you with is one I am sure you have all made at some point in your lives - I just have a different twist.  PUMPKIN PIE!  Now I am NOT a pie fan.  I am pretty sure it stems from my hatred of pie crust.  I have always loved pumpkin pie but I would only eat the filling growing up and leave a big empty pie crust shell on my plate.  A few years ago I discovered how to remedy the empty shell issue - GRAHAM CRACKER CRUST!  I love graham cracker crusts.  They are the perfect answer to my pie crust dilemma.

Pumpkin Pie with Graham Cracker Crust

  • 2 c Pumpkin , mashed or puréed
  • 3/4 c Sugar
  • 1 t Cinnamon
  • 1/2 t Ginger
  • 1/4 t Cloves
  • 2 Eggs
  • 1 can Fat Free Evaporated Milk
  • 1 1/4 c Graham Cracker Crumbs
  • 1/3 c Butter or Margarine, melted
  • 4 T Sugar
  1. Preheat oven to 375F.
  2. Combine the graham cracker crumbs, melted butter and 4T of sugar in a bowl.  Press the mixture into the bottom and sides of a pie plate and bake for 5-10 minutes or until golden brown.  Set aside.
  3. Increase oven temperature to 425F for 10 - 15 minutes or while you prepare the pumpkin filling.
  4. Mix together all remaining ingredients save the evaporated milk.  Slowly pour the evaporated milk into the mixture and combine well.
  5. Pour the pumpkin mixture onto the prepared graham cracker crust.  Reduce oven temperature to 350F and bake the pie for 40-50 minutes or until a knife in the center comes out clean.
  6. Serve warm (or cool) with cool whip and ENJOY!
The best pumpkin pie ever all due to a graham cracker crust!  The calorie count of this pie reflects the lack of "classic" pie crust as well.  For 1/8th of the pie you are looking at 200 calories, where as with a regular pie crust you would be facing 285 calories per piece!

Honorable mention goes to my water pitcher.  I have never gone through so much water before.  Very simply I added some cranberries and sliced lemons to my water picture and filled it up - such a hit!


And there you have them folks.  My picks for Thanksgiving favorites.  I could have added in the zucchini bake, sweet potato casserole, molasses cookies, or even glazed ham; but this post is long enough as it is.  I leave you with this wonderful picture of us just starting to gather about the table for our feast! :-)


Friday, November 16, 2012

Cakes, cakes and more cakes

I love making cakes (like most sweets).  They might not be perfect - as a matter of fact those that aren't used for Linc or Casey's birthdays are normally just thrown together without any thought of perfection.  Almost three years ago I made Brian a "Toad Mushroom" cake for his birthday.  Now that Linc is older he is Mario obsessed as well.  This morning he requested a "Toad Mushroom" cake for his unbirthday. (For those of you that don't know what an un-birthday is, I wish you a very merry un-birthday to you - yes you!  And yes, we have cake on unbirthdays as well as birthdays in this house :-D)

Despite not entirely wanting a wonderfully yummy cake in the house, Stink's request was made so sweetly that I couldn't turn him down.  So we set off to make a mushroom house cake - and yes I do mean WE.  Stinks has recently decided he likes helping me bake, though I am thinking it is just so he can lick the bowl and beaters when I am done - I'll take what I can get though!  Once the cake was in the oven and Stinks had the bowl for licking I made the frosting.  It's best to keep Stinks out of this step or I would have one very hyper little boy on my hands!

Finally the cake was done.  Stinks wanted to help decorate it so we set out frosting the mushroom and making it's spots.  He remembered that Daddy had a green Toad Mushroom from the pictures on our photo frame so he decided on a blue toad mushroom house that Mario and Toad could visit.  Linc is thrilled which means I am too.  And now we have a picture of Linc with his Toad Mushroom cake to put with Brian and his!

I decided that seeing I love making cakes so much I would share my gold cake recipe.  It is just a standard no frills cake recipe that is super easy and just as yummy!  (Warning:  if you were thinking you were getting a low calorie cake recipe, think again!)

Gold Cake

  • 1/2 c Vegetable Shortening
  • 1 c Sugar
  • 1 t Vanilla
  • 2 Eggs
  • 2 C Flour
  • 1 c Milk
  • 1 t Baking Powder
  • 3/4 t Baking Soda
  1. Preheat the oven to 350 F.  Prepare your pan(s) by greasing and flouring and set them aside.
  2. Cream together the shortening, sugar, vanilla, powder, soda and eggs.  
  3. Add the flour and milk alternately to the mixture.  Mix until well blended.
  4. Pour the batter into your prepared pan(s) and bake at 350 F until the cake is golden brown and a tester inserted comes out clean.
  5. Allow to cool slightly before removing from pan(s) and allow to cool completely before frosting.
  6. ENJOY
The cake recipe makes 24 cupcakes or one "character" cake.  If you are making a layer cake it will make 2 8-inch cakes for stacking.  All in all it is a great and versatile recipe.  If you want to really make a splash, divide the batter into 5 or more bowls and tint them all different colors.  Then pour the batter one by one into your prepared pan and bake.  The result will be a colorful cake that will get lots of comments!  
Once I find them, I will upload some more pictures of my previous cakes.


Thursday, November 8, 2012

Graham Crackers

This past summer I went on a "homemade s'more" kick.  I was determined to make a s'more with all homemade ingredients.  The marshmallows were not a big deal, I had made then before and could duplicate the recipe with complete success.

So, with one third of the recipe down I moved my sites onto the remaining two ingredients.  I have always wanted to make my own chocolate - from that very first trip through Hershey's World - isn't that the best smelling ride you have ever been on?  To do this I need to get my hands on some cocoa beans and then set aside an entire day to the process.  I am hopefully going to do this at some point this winter.

Finally the graham crackers.  There is nothing worse than eating a s'more on a stale or overly sugary graham cracker.  I feel that the marshmallow and chocolate should be the main taste of a s'more with the graham cracker simply being a sturdy vessel that provides a graham flavored crunch.  Have you ever had "Old Fashioned" graham crackers?  They aren't sugar filled, the graham flour is the most apparent.  They have a dash of honey and a wonderful crunch.  That is what I was after - and I am proud to say I succeeded.

Graham Crackers

  • 1 1/2 c All Purpose Flour
  • 1 1/3 c Graham Flour
  • 1 t Baking Soda
  • 1/2 t Salt
  • 1 c Butter or Margarine, softened
  • 2/3 c Brown Sugar
  • 3 T Honey
  1. Cream together the honey, butter, salt, soda and sugar.  Slowly add in the flours and mix until a dough forms.
  2. Remove the dough from bowl and play on parchment or wax paper.  Flatten into an inch thick square and refrigerate for at least 2 hours.  (You should be able to refrigerate the dough for a few days.)
  3. After chilling the dough, remove from the fridge and set on a floured workspace.  
  4. Preheat the oven to 350 F and lightly grease your cookie sheets.  (You can line the sheets with parchment paper if you prefer.)
  5. Roll the dough to about 1/8 inch thickness and cut out your "crackers".  
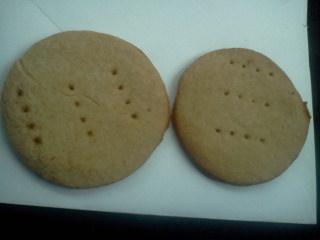
  6. Transfer your dough crackers to the prepared sheets.  Be sure to "score" the crackers with a fork for an authentic look.  Back for 10-15 minutes or under the crackers are a golden brown color and are firm.
  7. Remove crackers from sheet to cool.  They will "crunch-up" as they cool.
  8. Enjoy
It should be noted that these crackers are NOT sugary.  If you were looking for the cinnamon-sugar flavored crackers that is a different recipe entirely (which I will share at a later point).  Please also keep in mind that I did not grind down my graham flour, thus your will have a graham texture in the cookie - something I like yet might not be enjoyed by all.

I cut my crackers into 1.5 inch circles, the recipe made 58 crackers.  I can't wait to try these again in the spring time when I can roast a marshmallow and, hopefully, include some homemade chocolate!

Calorie wise they are what you would expect - 50 calories per cracker (if you make 58 crackers)!

I, again, forgot to take pictures so I will update later with some better ones.

Shout out to my Aunt for taking a picture and texting it to me!

Friday, November 2, 2012

Mini Banana Chip Muffins

Per the Stinks request I set out to make mini muffins today.  In true Stinkles fashion, however, when they were completely he had moved on and wanted nothing to do with them.  It is not a review of the muffins that made him turn his nose up, it is his three year old attention span!

After the calorie intensive PB&J muffins from the other day I decided to swing the other way and make a low calorie mini muffin.  I think these are a success!  Of course if you don't like banana's, this is NOT the recipe for you.  I, however, love banana bread and therefore really like this recipe!

Mini Banana Chip Muffins

  • 1 c Flour
  • 1 c Banana, mashed (about 3 medium bananas)
  • 1 T Baking Powder
  • 1/2 t Baking Soda
  • 1/4 c Sugar
  • 1/4 c Unsweetened Applesauce
  • 1 Egg
  • 1/2 t Vanilla 
  • Chocolate Chips (optional but add that extra something)
  1. Preheat the oven to 350 F and grease your mini muffin tins.  (These can be made into regular muffins as well, but Stinks hardly ever finishes a full size muffin so I stuck with mini muffins.)
  2. Mix together the sugar, mashed bananas, applesauce, vanilla and egg.
  3. Mix in the powder, soda, and flour.
  4. Finally mix in the chocolate morsels.  (You will notice in the picture that I used white chocolate pieces - again at the little one's request!)
  5. Scoop a tablespoon of batter into each mini muffin cup.  (Be sure to only fill them 3/4 of the way or they will spread too much.)
  6. Bake until the muffins are set and a tester inserted in the center comes out clean.  (Be sure to cook until the sides start to brown - I removed my mini muffins a little early.  They still taste good, but I think they would have been even better if the side browned up nicely.)
  7. Allow to cool for about 10 minutes before removing the muffins from the tin.  
  8. ENJOY!
As this is my first time making these muffins I wasn't sure how many the recipe made.  It turns out that I made 24 mini muffins (though I overflowed about 14 of them so I could have easily had 30 mini muffins) and 2 regular muffins.  Taking that into account, I would say the recipe makes about 35 mini muffins or 12-14 regular muffins.  If you are making mini muffins, the calorie count comes in at about 35 calories per muffin.  If you are making regular muffins the count comes in at about 90 calories per muffin.  In either case I am pleased!  (If you want to omit the chocolate morsels - I used about 1/4 of a cup - then the calories come in at 26/mini muffin and 70/regular muffin!)

UPDATE:
I am just writing to say that these muffins are now a staple in our house.  I no longer make them mini - Brian and I prefer the normal muffin size.  They don't puff up as much as "normal" muffins, but they aren't nearly as calorie intensive so I am ok with this!  I can normally make about 18 muffins (I sometimes use 4 bananas and have been known not to measure all that well) which brings the calorie count to about 80 calories per muffin.  (I also use egg beaters.)


Let me know if you try them - I always like feedback!

Monday, October 29, 2012

Lemony Crinkle Cookies

I had such high hopes for these cookies.  I am posting this recipe as is because Brian said they were good.  In my opinion they lack lemon.  I will need to double the lemon juice and adjust the flour the next time I make these.  Now I am not normally a fan of crinkle cookies cause, well, they make a HUGE mess!  My mother (or an aunt) always seems to make chocolate crinkle cookies for our christmas cookie swap, more power to them.  Eight dozen crinkle cookies, I can only imagine the chocolate and powdered sugar mess that I would make.  Anyway, as I told you all with the lemon bars, I love lemon so I was willing to deal with a crinkle cookie if it meant wonderful lemony goodness.  To me these taste more like a sugar crinkle cookie with a SLIGHT lemon undertone.  I will have to jazz them up a bit.

Lemony Crinkle Cookies

  • 1 c Butter or Margarine, softened
  • 2 c Sugar
  • 1 t Vanilla
  • 2 Egg
  • 2 t Lemon Zest
  • 2 T Lemon Juice
  • 1/2 t Baking Powder
  • 1/4 t Baking Soda
  • 3 c Flour
  • Confectioner's Sugar for dusting
  1. Preheat your oven to 350 F and lightly grease your cookie sheets.
  2. Beat together the sugar and butter until light and fluffy.  
  3. Add in the eggs, vanilla, lemon zest and lemon juice.  Mix until well blended and slightly fluffy again.
  4. Slowly add the remaining ingredients.  Dough will be sticky.  
  5. Roll heaping teaspoons of the dough into the confectioners sugar to coat and drop them on the greased cookie sheets.  
  6. Bake the cookies for about 10 minutes, or until the bottoms are barely brown and the cookies have lost their sheen.  
  7. Allow the cookies to cool on the baking sheet for at least 2 minutes before moving to a cooling rack.  This is important cause if you try to move them too soon they will crumble.
  8. ENJOY!
The recipe makes about 6 dozen cookies (on the smaller size).  They are good, they just seem to lack the lemon kick I was looking for.  I haven't given up on them yet.

The cookies come in around 55-60 calories/ cookie.  Not bad all things considered.  If you like lemon, not strong lemon but lemon, then give them a try.

Brown Sugar Glazed Apple Cake

This weekend was a weekend of Halloween parties.  Now I am sure most people think candy and pumpkins when it comes to Halloween, I think apples.  It is probably cause Halloween means fall and fall means fresh delicious apples, at least in my crazy head.  That being said, I set out to make a new apple recipe for one of the parties.  *I do so like it when I get to combine things in a satisfactory way*  I came across a brown sugar glazed cake in one of my many cook books and thought - PERFECT! (The recipe was from a version of Southern Cakes if you are interested.)  Make it an apple cake and we are in business!  I must say I am pretty pleased with the results!  The cake was moist and the brown sugar glaze gave it just the perfect amount of "caramel" flavoring without actually being caramel (you know for people like myself that are not a fan of caramel).

Brown Sugar Glazed Apple Cake

  • 1 1/2 c Flour
  • 1 c Sugar
  • 1/2 t Baking Soda
  • 1/2 t Cinnamon
  • 2 Eggs
  • 1/4 c Oil
  • 1/4 c Applesauce
  • 1 t Vanilla
  • 1 1/2 c Apples, peeled and chopped
  • 1/2 c Brown Sugar
  • 3 T Butter or Margarine
  • 1 T Whole Milk
  • 1/2 t Vanilla
  1. Preheat the oven to 350 F and grease an 8 x 8 pan (or use a round pie dish - that it what I normally use).
  2. Combine the flour, sugar, soda, cinnamon, eggs, oil, applesauce, 1 t of vanilla and apples in your mixer and blend well.
  3. Pour mixture into your prepared pan and bake for 35- 40 minutes or until a tester inserted in the center comes out clean.
  4. Once the cake is out of the oven, place the brown sugar, butter, whole milk, and 1/2 t of vanilla in a sauce pan and bring to a slow boil.  Cook the miture for 3-5 minutes (you will notice it thickens).  Remove from heat and let sit until it is no longer bubbling.  Spoon the brown sugar mixture over the still warm cake.  
  5. Set the cake aside until the brown sugar mixture cools. 
  6. ENJOY!
I am VERY sorry for not having any pictures.  It completely escaped my mind to snap a few before the party.  I am sure I will be making this again in the near future so I will update with some pictures at that time.

Calorie-wise it comes in as expected.  I played around a little with the recipe (read: oil/applesauce and eggs) but it is still an apple cake - which never creates a 100 calorie snack!  The cake is easily cut into 16 pieces no matter what baking pan you use and therefore I base the calorie count on 16 pieces.  One piece of the cake will run you about 175-180 calories - not great but not horrible either and completely yummy!

PB&J Muffins

It's muffin day here at the ranch.  With the threat of Sandy looming over our afternoon I decided to get some quick cooking in this morning.  I am a big fan of peanut butter and jelly!  Skippy or JIF peanut butter and Welch's "Natural Concord Grape Spread" - yum!  I make PB&J cookies but I have never tried muffins, well today is the day.  I adapted a recipe that had a LOT of oil, butter and eggs in it so I am hoping they come out ok - why so much butter and eggs when you have the oily/yummy goodness of peanut butter in your mix?

PB&J Muffins

  • 2 c Flour
  • 1T Baking Powder
  • 1 c Milk
  • 2 Eggs
  • 2/3 c Sugar
  • 1 c Peanut Butter (I use creamy but use what you have)
  • 1/3 c Unsweetened Applesauce
  • 1/2 c Jam or Jelly
  1. Preheat your oven to 375 F and grease your muffin tin.
  2. Mix together the applesauce, sugar, eggs and peanut butter.  Add in the powder and mix well.
  3. Alternate one cup of flour with the cup of milk and finally the last cup of flour.  Mix well until there are no lumps.
  4. Spoon the mixture into your muffin tins until they are about half full.  Top each muffin with 2 teaspoons of jam/jelly.  Divide the remaining batter between the the muffins to "close off" the jam/jelly.
  5. Bake for about 20 minutes.  
  6. ALLOW TO COOL BEFORE EATING.  The muffin might taste wonderful right out of the oven but the jam/jelly inside the muffin is steaming hot and you do NOT want to burn your mouth/tongue on that - trust me!  
  7. Enjoy!


The original recipe claims to have made 12 muffins - I did adapt the recipe and my first time making them I just made 12 muffins.  Twelve VERY LARGE muffins, which isn't a bad thing but not everyone likes a huge muffin!  I think the next time I make these I will shoot for 18-24 muffins instead.

These are NOT calorie friendly at all - but let's be honest what with peanut butter is?  If you only make 12 muffins they come in at around 400 calories a piece (which is still less than a REDUCED FAT blueberry muffin from Dunkin Donuts - so I guess perspective).  Obviously, if you make 24 muffins you are looking at a more doable 200 calories/muffin.

Seeing I am such a fan of PB&J, I am more than willing to spend the 200 (or even 400) calories on one of these beauties.  If you are the same, try them out.  Be sure to let me know what you think!

Saturday, October 27, 2012

Pumpkin Chocolate Chip Cookies

In keeping with the spirit of fall, and the fact that this weekend we have multiple Halloween parties to attend, I have decided to make pumpkin and apple treats this weekend.  The original thought was pumpkin bars, but I didn't feel like cooking with cream cheese today - yes I know I am weird.  So I transfered my attention to cookies.  Now I have already made some wonderful pumpkin spice cookies but they were missing the one ingredient I DID want to work with  - chocolate.  And so, pumpkin chocolate chip cookies were created!

Pumpkin Chocolate Chip Cookies

  • 1 c Butter or Margarine, softened
  • 3 c Sugar
  • 2 Eggs
  • 2 c Pumpkin Purée
  • 2 t Vanilla
  • 2 t Cinnamon
  • 1 t Nutmeg
  • 1/2 t Cloves
  • 4 1/4 c + 2T Flour *
  • 2 t Baking Powder
  • 2 T Baking Soda
  • 1 c Chocolate Chips
  1. Preheat your oven to 375 F.  Lightly grease your cookie sheets and set aside.
  2. Cream together the butter, sugar, eggs, pumpkin, vanilla, cinnamon, nutmeg, and cloves.
  3. Add the powder and soda to the mix and blend well.
  4. Slowly add in the flour 1 c at a time until all the flour is added and mixed well.
  5. Finally add in your chocolate chips - I never actually measure chocolate chips, I just pour :-D.
  6. Drop the batter by rounded spoonfuls onto your greased cookie sheet and bake for 10-12 minutes.
  7. ENJOY
This recipe makes a LOT of cookies.  If you make them on the smaller side you could easily get 8 dozen.  I got just shy of 7 dozen and they were fairly large.  The calorie count obviously depends on how many cookies you make.  For my 80 cookies the calories came in at 79/cookie.  Not all that bad considering they are a COOKIE made with butter, sugar, flour and CHOCOLATE.  They are pretty good and I will be bringing them to the first of the Halloween parties this weekend.
This is a THIRD of the batch!
*I have starred this ingredient due to the "crazy" quantity.  The recipe that I adapted for this cookie required "cake flour".  I only buy all purpose flour (and the occasional graham).  The difference between pastry, bread, all purpose, etc flours is the amount of gluten present in the flour.  I have a conversion chart that I reference when something like this comes up and I have decided it might be a nice thing to share:

When the recipe calls for:Substitute: 
1 cup sifted cake flour 1 cup minus 2 tablespoons sifted all-purpose flour 
1 cup pastry flour 1 cup minus 1 tablespoon all-purpose flour 
1 cup self-rising flour 1 cup minus 1 tablespoon all-purpose flour plus 11/2teaspoons baking powder and 1/8 teaspoon salt 
1 cup all-purpose flour 1 cup plus 1 tablespoon pastry flour 

I hope that will help you all as much as it helps me - I just don't have room to keep all the different types of flour in my house!

As always if you give these cookies a try let me know your thoughts!!