Friday, November 30, 2012

Tomato Tortellini Soup

I am throwing this one out there after a VERY annoying day in the kitchen.  Nothing seemed to go right for me while making this soup.  I actually went through 2 whole batches before I decided the third and final one was palatable.  Though I might be willing to incorporate tomatoes into my previously tomato free life, I think tomato soup is still a few months off for me.  I did eat my whole bowl though so that says something!

First I should say that you will either need to make or buy some tomato basil soup for this recipe.  If you make the soup the calories are reduced by about 20 per serving if you use the homemade tomato basil soup recipe I listed below.  It is a lot more steps, and you end up with a LOT of soup, but if you wanted to make the Tomato Basil Soup recipe and freeze it in 2 cup quantities, you would have it for when you wanted to make this recipe.

So here are the two recipes:

Tomato Basil Soup

  • 2 c Chicken Broth
  • 28 oz Diced Tomatoes*
  • 1 Small Onion, diced
  • 1 Celery Stalk, diced
  • 1 Garlic Clove, minced
  • 1 t Thyme
  • 1/2 c Fresh Basil, chopped
  1. Sauté onions, celery and garlic over medium heat until translucent.
  2. Combine remaining ingredients and simmer for about 10 minutes. 
  3. Either use a hand blender or transfer the soup to a blender and process till smooth.
  4. Makes about 6 cups of Tomato Basil soup at about 60 calories per cup.

Tomato Tortellini Soup

  • 2 c Tomato Basil Soup
  • 3 c Chicken Broth
  • 1 c Water
  • 14 oz Diced Tomatoes*
  • 8 oz Tomato Sauce*
  • 4 oz Low Fat Cream Cheese
  • 2 c Cheese Tortellini
  1.  Combine all ingredients save the cream cheese and tortellini in a heavy stock pot over medium heat.  Bring to a simmer.  
  2. Scoop out about 1 cup of the soup mixture.  Whisk together the 1 cup of soup mixture and the 4 oz of cream cheese until smooth.  Add the mixture back into the soup.
  3. Simmer on low/medium heat until well combined.  
  4. Add the tortellini and cook until tender - about 10 minutes.
  5. ENJOY
*I used canned but feel free to use homemade or freshly diced.

The Tomato Tortellini soup makes about 13 cups.  I divided that into 8 servings of 1.5 cups (with a cup to spare).  The calorie count of this soup really depends on the tomato basil soup you decide to use.  If you use the homemade version then the calories come in at about 150 calories per serving.  If you decide to use canned soup you are looking at about 170 calorie per serving.  All in all not that bad.

I pared this soup tonight with some Peasant Bread, my new favorite bread recipe.  I actually ended up chunking the bread and throwing it right into the soup.  I know that this post hasn't been the most enthusiastic, but please try to remember that until 3 months ago I didn't even eat tomatoes so for me to actually finish my bowl of TOMATO SOUP is a huge deal.

Sorry for the horrible picture - as per usual I completely forgot about taking pictures until the plates were clean.


Black Bean Brownies

Yup you read that right, BLACK BEAN brownies.  A few years ago I probably would have scoffed at anyone that said those three words together - but now I will pretty much try anything.  They aren't all that bad.  I think the recipe would go MUCH better if I had an actual food processor and not just a magic bullet.  I am going to have to write to Santa for one.  There is that after taste of black beans, but seeing I like black beans it doesn't bother me too much.  These would probably be even better with some frozen yogurt or even a dollop of cool whip.

The Black Bean Brownies are only about 70 calories less than a regular brownie however so I guess it all depends on your preference.  If you are looking for a brownie recipe that doesn't contain flour then this is for you.

Black Bean Brownies

  • 15 oz (1 can)  Black Beans, drained and rinsed
  • 2/3 c Sugar
  • 2 Eggs
  • 2 Egg Whites
  • 1 t Vanilla
  • 5 T Cocoa Powder
  • 1/4 c Butter or Margarine, melted
  • 1/2 c Chocolate Morsels
  1. Preheat the oven to 350 F and grease an 8 x 8 pan.
  2. Place all ingredients, save the chocolate morsels, in a food processor and process till smooth.
  3. Pour the mixture into your prepared pan.  Sprinkle the morsels over the batter.
  4. Bake for 30-35 minutes or until firm to touch.
  5. Allow to cool and ENJOY

The brownies are fairly fudge-y in consistence.  I sprinkled a shake of confectioner's sugar on the top as well.  I cut the recipe into 16 pieces which yielded about 120 calories per serving.  As I said earlier, they aren't bad but I am not sure if the calorie savings is big enough for me to forgo my old standby Hershey Brownies.

If you give them a try let me know your opinion!

Wednesday, November 28, 2012

Day 101...

Continuing my habit of posting on odd days I give you day number 101.  I know I just posted three days ago, but it's my blog and I am feeling chatty :-D.

**I would like to start this post with a GREAT BIG GIANT SHOUT OUT OF CONGRATULATIONS to Brian for hitting and EXCEEDING 50 pounds lost!!! (In the very short period of three months I might add.)  Not only am I excited but I am very proud of him.  He has really taken to the new routine of things and it shows.  Brian you are an amazing inspiration - as well as a great support.  I thank you so much!  CONGRATS!!**

Three days ago I informed you of my wonderful accomplishment (or two if you count the jeans).  I have tried every day since to recreate the wonderful mile I jogged with limited success.  I can do 3/4's of a mile no problem but that last quarter seems to get me.  Have no fear I won't give up.  I will keep trying until I can jog one mile a day for 7 days straight (look for that super excited post to come in 6 months :-/ - it's a long term goal).

The actual reason for my post today, besides it being day 101 which is just a perfect day for a post, is to officially say that I have achieved my December 1st goal of losing 40 pounds.  (With two ounces of wiggle room to spare as well! - hey every little bit counts!)    

Now that December is just around the corner I was thinking back on when I started this whole thing.  I remember saying I would be thrilled if I could lose 30 pounds by the end of the year.  Seeing I started at the end of August that would have given me a little over four months to achieve that goal.  The first month came and went and I had already hit the half way mark.  I reassessed and decided on 30 pounds by Thanksgiving.  When I hit the 30 pound mark I decided on 40 by December 1.  I am not so sure it is a good thing that I would "change" my goals but it certainly kept me going.

I would love to be able to say my new goal is 50 pounds by the end of the year, but I want to be realistic.  Between now and the end of the year lays Christmas and all the parties and gathering associated with that wonderful holiday.  I am certainly going to work towards 50 pounds by the end of the year but I am setting my goal at 45.  Let's face it, I am going to enjoy one or two pieces of my mother's wonderful peanut butter fudge - it wouldn't be Christmas without it!  I should also point out that I have set the goal to 45 cause I am certainly slowing down.  The very first month of my journey I was losing an average of .523 pounds PER DAY.  The second month slowed me down to .488 pounds per day.  I am now losing about .397 pounds per day.  I am not complaining, that is still a loss.  I have to be realistic though, to expect the kinds of results I experienced in the first month would set myself up for disappointment.

The numbers for my 101st day:  40.1 pounds lost.  Averaged to:  11.94 pounds lost per month.  2.86 pounds lost per week.  And finally .397 pounds lost per day.  I am going to say I am still pretty happy with that!

This is a journey, synonymous with expedition or voyage not a quick jaunt, and I intend to see it through!

Sunday, November 25, 2012

Cheeseburger Pie

Tonight for dinner I wanted something simple, yummy, and that would produce leftovers for lunches.  Having a sick Stink's meant that I needed to make dinner with what I had on hand - and I hadn't been for groceries in a while so that meant essentials only.  I decided on throwing together a cheeseburger pie cause it was quick which meant I could spend lots of time cuddling with Stinks on the couch and less time by the oven!  

Cheeseburger Pie
  • 3/4 lb Ground Beef
  • 2 T Ketchup
  • 1 t Mustard
  • Minced Onion, to taste
  • Garlic, to taste
  • 2 T Milk
  • 2 T flour
  • 1/3 c Dill Hamburger Pickles, chopped
  • 2 T Pickle Juice
  • 1 c Shredded Cheese of your choice
  • 1 can (8 rolls) Reduced Fat Crescent Rolls *
  1. Preheat oven to 375 F.
  2. Spread 6 of the crescent rolls out on the bottom and sides of an 8-inch pie plate. Set the remaining two rolls aside along with the pie plate.
  3. In a large fry pan brown the beef with the garlic and onion.  Stir in the ketchup, mustard, milk, pickles, pickle juice and flour.  Cook until slightly thickened.
  4. Removed from heat and add 3/4 c of cheese to the meat.  Mix to combine.  
  5. Pour the meat mixture into the prepared pie dish.  Top with the remaining cheese.  Top all of that with the remaining two rolls.
  6. Bake for 15 - 20 minutes or until the edges of the rolls are browned.
  7. Allow to cool for a few minutes before serving - this will set the meat.
  8. ENJOY
As you can imagine this was a hit with the Hubby.  I have to say it was fairly good as well.  I divided the recipe into six servings.  The calorie count of each serving (using reduced fat cheddar cheese) was about 305 calories.  One slice and some broccoli/cauliflower mix was more than enough to fill me up, Brian on the other hand decided on having two slices.  

The only thing I can say about this recipe is that I would bake it for longer.  I prefer my crescent rolls to be flakey instead of gooey.  Brian prefers gooey to flakey.  I settled for something in the middle, but if I was going to call it perfect I would have gone for a flakier crust - which probably would have required me to bake the crust prior to filling.  I also think I would add freshly chopped onions instead of minced, but I am an onion fan.

*I do have a recipe for homemade crescent rolls however I have not perfected it so this was made with Pillsbury.  

Sorry about the photos, I was trying to use our little Nikon but it didn't like me so all the pictures are washed out.  I will have to crack out the good camera soon!
Let me know your thoughts!  

Excited

So I was going to wait for the 100th day of my journey to post but I am just too excited!  Let me preface this by saying I understand that to some these are not big accomplishments but to me they are - and this blog is about me so you have to read about them :-D.

The first accomplishment is exercise related.  If you know me you know that I was also fairly fit throughout high school.  I played multiple sports a year with conditioning/summer ball on all off seasons.  That being said I have NEVER been a great runner/jogger.  For some reason when I ran I would lose my breath very quickly.  Now I am asthmatic, but I am also very very stubborn.  I would push myself till my vision would blur, then black and I would wake up on the ground with a worried coach standing over me.  It was always a point of extreme disappointment to me that I couldn't even JOG a whole mile without blacking out.

I am VERY happy to say that is NO LONGER THE CASE! A little while ago I told you all about how I was thrilled that I jogged a quarter mile.  Well about a week ago I moved up to a half mile and that went well.  Today I was shooting for 3/4's of a mile and I just kept going.  I was feeling good and my stubborn nature kicked in making me want to, for the first time in my life, finish out a mile at a jog.  Please read that as JOG - I am not running, baby steps people.  I would also like to point out that there is no way in hell anyone can deflate me for this accomplishment.  In the world of Amy this is HUGE.


The second accomplishment is actually a little embarrassing.  I started the journey portion of my blog to not only keep myself honest but to also help other people in my situation.  I have hoped that by my writing out everything - good and bad - someone else would look at it and say "I don't have to be afraid or ashamed".  I am sure there are people questioning why I would use the word ashamed, let me just say that no matter how strong you think you are there are always feeling of shame.  I want to put all of my journey out there to help other people - I know what it feels like and if they can use my journey as a source of comfort or strength then all the better.

So here it goes:  for the first time in 12+ years I fit in jeans from the "Regular" side of the store.  I was actually able to walk out of the "Plus" section and try on and BUY not only one but TWO pairs of jeans from the "regular" section.  Again I state this with some embarrassment, but I need to be strong and true to myself - and I am proud of myself.  The size really means nothing to me.  I am sure if I searched and searched I could have found some store that would have fit me before.  I am proud that I am healthy.  I am proud that I had the courage to even try - cause it does take courage.  I am just proud, and I think I have every right to be.

Thanks for reading and not judging.  As you can tell I am SUPER EXCITED!

Oh yeah - I am really making a push to hit 40 pounds lost by December 1st.  So if you are in my day to day life and you see me making some bad choices remind me of my goal!  I have a little over a pound to lose and I would LOVE to lose it by the first or my birthday the latest!!

Turkey Day Favorites

I have at least three recipes that I want to share with you from Thanksgiving, but seeing they are all related I decided to do a "Thanksgiving Episode"!  We were fortunate enough to host this year for the Hubby's side of the family - there is no way my side would all fit in the house let alone have a sit down meal!  I was super excited!! Not only did I get to cook the turkey and ham, but I got to create some delicious side dishes and stage what I hope was a wonderful meal.  It seemed to go wonderfully so I am hoping to make our hosting into an every other year tradition!

Now for the recipes.

This year I decided to brine the turkey.  Now I have brined meats in the past with good success, but I have never brines a turkey.  Especially not for a main course holiday!  Of course I contemplated spending the $15/can on some Williams Sonoma brine but I just couldn't bring myself to do it.  I decided I could make my own based on my tastes and hope everyone else would enjoy it.

Turkey Brine

  • 1/2 Gallon Water*
  • 2 1/2 Tubs Veggie Stock* (*or enough bouillon/broth to make 1/2 gallon) 
  • 1/2 c Salt
  • 1/2 c Sugar
  • 1 T Rosemary
  • 1 T Sage
  • 1 T Thyme
  • 1/2 t Garlic 
  • 1/2 Gallon Cold Water
  1. Combine all ingredients save the 1/2 gallon of cold water in a stock pot.  Bring to a rolling boil and cook until sugar and salt are dissolved.  
  2. Remove from heat and allow to cool slightly.
  3. While the brine is cooling prepare your turkey by removing the innards and giving it a good washing.  Pat the turkey dry and place it in a brining bag or large pail - I use a brining bag cause space is limited in my fridge.
  4. Combine the cooled mixture with the 1/2 gallon of cold water, mix together and pour over the turkey.  
  5. Seal up the bag or pail and place in the fridge for approximately 1 hour per pound of bird.  
  6. Once the brining is complete be sure to RINSE YOUR BIRD THOROUGHLY or you will have a very salty tasting dinner.  
  7. Stuff and/or cook your turkey as you normally would - keeping in mind that brined birds tend to cook a little faster than non-brined.
  8. ENJOY
See, easy!  If you have a super large bird that the brine does not cover completely then you will have to flip it half way through the brining process (or simply double the recipe and use enough brine to cover the bird).  It produced a wonderfully tender and juice turkey with just the right hint of seasonings.  I was very pleased!  Forget spending $15 for a one time use can of brine mix - this will now be my go to for brining large birds!


The next recipe I am going to share is my stuffing recipe.  Now I grew up in a Portuguese family, which means that stuffing contained chourico or linguica.  Now Portuguese sausage is wonderful, especially with peppers, onions and some cheese on a roll, but it can be an acquired taste and I was cooking for non-Portuguese people.  (I should point out that I am not a huge stuffing fan to begin with, if I want to eat bread I am going to eat bread.  It doesn't have to be mashed and flavored :-D)  To that end I wanted to create a stuffing that still had the same principle of the stuffing I grew up with, but without the extra kick linguica would give it.  I give you:

Chicken Sausage and Herb Stuffing

  • 14 oz Wheat Bread (about 3/4 of a large loaf)
  • 2 T Butter or Margarine
  • 1 1/2 c Onion, diced
  • 1 3/4 c Celery, diced
  • 4-5 links Chicken Sausage (I used Italian flavored)
  • 2 1/2 - 3 1/4 c Chicken Broth
  • Sage, to taste
  • Thyme, to taste
  • Garlic, to taste
  • Salt and Pepper, to taste 
  1. Toast and shred the bread into a large bowl.  I have found this is the easiest way to dry out the bread, but you can also cube it and bake in the oven or leave out on the counter over night - though this method has been met with varying success.  Set the bowl aside.
  2. Remove the casings from the sausage links and chop into small pieces to facilitate crumbling.
  3. In a large fry pan combine the celery, onion, butter and sausage.  Cook on medium high heat until sausage is warmed through and celery is translucent.
  4. Add the sausage mixture to the bread bowl and mix well.  
  5. Mix in the spices to taste and slowly add the broth until the desired consistency is achieved.
  6. Transfer the stuffing to a lightly greased casserole dish.  Now you can either bake this dish now, or refrigerate the stuffing until Just before your turkey is done cooking.
    1. To cook the stuffing immediately you should preheat your oven to 375 F.  Cook the stuffing to 30 minutes, removed from the oven and mix gently.  Return to the oven and cook for another 20-30 minutes until golden brown.
    2. To prep the stuffing for future cooking just place in the fridge.  Remove the stuffing about 10 minutes prior to cooking to allow it to acclimate.  Seeing the stuffing takes about 1 hour to cook I find it is best to throw it in the oven during the last 20 minutes of the turkey cooking.  That way the stuffing will cook while your turkey is "resting".
  7. ENJOY
Again, easy!  Now stuffing is mostly bread so if you are thinking that it is a lower calorie food I am sorry to burst that bubble.  That being said this stuffing actually comes in not as high and one would have expected.  I divided the recipe into 9 equal servings - which for this limited stuffing eater was a BIG portion - and came up with about 175-180 calories per stuffing.  Not bad for chickeny bready goodness!


The final recipe I will leave you with is one I am sure you have all made at some point in your lives - I just have a different twist.  PUMPKIN PIE!  Now I am NOT a pie fan.  I am pretty sure it stems from my hatred of pie crust.  I have always loved pumpkin pie but I would only eat the filling growing up and leave a big empty pie crust shell on my plate.  A few years ago I discovered how to remedy the empty shell issue - GRAHAM CRACKER CRUST!  I love graham cracker crusts.  They are the perfect answer to my pie crust dilemma.

Pumpkin Pie with Graham Cracker Crust

  • 2 c Pumpkin , mashed or puréed
  • 3/4 c Sugar
  • 1 t Cinnamon
  • 1/2 t Ginger
  • 1/4 t Cloves
  • 2 Eggs
  • 1 can Fat Free Evaporated Milk
  • 1 1/4 c Graham Cracker Crumbs
  • 1/3 c Butter or Margarine, melted
  • 4 T Sugar
  1. Preheat oven to 375F.
  2. Combine the graham cracker crumbs, melted butter and 4T of sugar in a bowl.  Press the mixture into the bottom and sides of a pie plate and bake for 5-10 minutes or until golden brown.  Set aside.
  3. Increase oven temperature to 425F for 10 - 15 minutes or while you prepare the pumpkin filling.
  4. Mix together all remaining ingredients save the evaporated milk.  Slowly pour the evaporated milk into the mixture and combine well.
  5. Pour the pumpkin mixture onto the prepared graham cracker crust.  Reduce oven temperature to 350F and bake the pie for 40-50 minutes or until a knife in the center comes out clean.
  6. Serve warm (or cool) with cool whip and ENJOY!
The best pumpkin pie ever all due to a graham cracker crust!  The calorie count of this pie reflects the lack of "classic" pie crust as well.  For 1/8th of the pie you are looking at 200 calories, where as with a regular pie crust you would be facing 285 calories per piece!

Honorable mention goes to my water pitcher.  I have never gone through so much water before.  Very simply I added some cranberries and sliced lemons to my water picture and filled it up - such a hit!


And there you have them folks.  My picks for Thanksgiving favorites.  I could have added in the zucchini bake, sweet potato casserole, molasses cookies, or even glazed ham; but this post is long enough as it is.  I leave you with this wonderful picture of us just starting to gather about the table for our feast! :-)


Tuesday, November 20, 2012

3 Month Mark

As I am sitting here eating my "Cool Cuts Perry the Platypus Pizzeria Salad" I realized that today is the three month mark of my journey.  Though I am not seeing the same magnitude of results I saw during the first month, I am going to say that I am still happy with my progress.

I knew the weight loss would slow down - there was no way I would be able to keep up losing 3-5 pounds per week, but it hasn't STOPPED so that is good.

Due to a weekend trip out to eat, I have noticed that my eating habits have DEFINITELY changed.  I am not saying that I CAN'T eat anything and everything, but I can tell you that my body will let me know when I do.  After a particularly greasy meal I found myself CRAVING an apple.  As a matter of fact I think I ate an entire pound of lettuce that night as well.  I have also noticed that it is getting easier to walk away from certain foods - though let me tell you having a cake in the house was NOT a good move and it ended up in the trash so I wouldn't eat it.  I am still asking for a to-go box at the beginning of my meals when we are out and that is also still going really well.

My energy levels seem to be on the rise again.  I noticed that after having Stinks I would be in bed - not necessarily asleep, but in bed - very soon after I put him to bed.  Now this could have been due to being sick, but over the past year I think it was just due to being a lazy slob.  In the past three months I have gone back to my normal 11 or later bed time and I am getting up at 6 without feeling like a wretch.  I also am no longer huffing and puffing after running around with Stinks - always a good thing.

Finally I  noticed that I have increased my walking speed at least 1.5 mph.  I know it doesn't seem like much, but in my opinion it is huge.  Think about it - say when I started this journey my average walking speed was 2 mph (it wasn't I am just using that as an example).  Now, three months in I would be walking at 3.5 mph.  I think that is great!

And now for the numbers.  They aren't as great as I would like them to be so please excuse the lack of enthusiasm.  36.7 pounds lost in 3 months.  That is 12.23 pounds per month.  I have slowed down so much I feel like the 40 pound mark is very far away, but I am not giving up.  I will DEFINITELY reach that mark by the end of the year - I am hoping to reach the 45 pound mark by the end of the year.

I would say all in all I am in a positive place right now.  Don't worry, I am sure the scale will hate me in the next few days and I will be posting about how I am stuck!

Monday, November 19, 2012

Taco Stew

I am using the term "stew" loosely here seeing I technically precooked the meat.  Names aside this dish surprised me.  I was expecting a very spicy Mexican soup that I wouldn't be able to take more than two bites of without crying for a glass of milk.  It wasn't bad at all - if this wimpy girl could handle it than I am sure everyone else can as well. I should point out that I did add half an avocado to my soup, and that did seem to help with the spiciness - but I took a good 5 spoonfuls before adding the avocado and didn't cry :-D.  It is also one of those recipes that contains all in-house ingredients, we all know how I love those!

Taco Stew

  • 1 lb Ground Beef
  • 1 Onion, chopped
  • 2 Garlic Cloves, minced
  • 2 T Taco Seasoning*
  • 3 Chicken Bouillon Cubes
  • 3 1/2 c Water
  • 1 Large Zucchini or 2 Small, cubed
  • 1 can Black Beans, rinsed
  • 1 can Diced Tomatoes
  • 1 1/2 c Corn
  • 1 c Salsa
  • 2 oz Cheddar Cheese, shredded (optional, but I think it added that missing layer)
  1. In a large pot, brown the beef with the onion and garlic over medium heat. 
  2. Sprinkle taco seasoning over browned beef and cook for about 5 minutes. 
  3. Add remaining ingredients, except cheese, and stir to mix well.   Bring the mixture to a rolling boil.  Reduce heat and simmer for 20-30 minutes.
  4. Dispense into bowls and top each with some cheese.
  5. Enjoy!
Isn't that simple?!  Now comes the good part - the recipe makes about 10 servings.  (I say about cause I don't really measure everything as well as I should - I am really more of an eye-ball cooker so the water might not have been exactly 3.5 cups.)  So 10 servings of 1.5 cups each and they are less than 170 calories a serving!  For something so full of flavor I really was happy with the calorie count.  We had it tonight with some chunks of peasant bread.  YUM.

*I know I have posted this before, however it bears repeating.  Don't forget you can throw together your own taco seasoning from all the standard seasonings you have in your cabinets.  Here is the "recipe" I use:

  • 1 T Chili Powder
  • 1/2 t Garlic
  • 3/4 t Minced Onion
  • 1/4 t Red Pepper Flakes
  • 1/2 t Oregano
  • 1 1/2 t Cumin
  • 1/2 t Salt
  • 1 t Black Pepper
  1. Mix all and use per taste preference!


As always, I completely forgot to snap a shot of the soup once I had it all ladled into bowls.  I thought about it while ladling, but once I actually sat down to eat it all thoughts of photography flew right out of my head.  I promise to update with a picture the next time I make it!

Peasant Bread


By now you should all know that I love bread.  Sweet breads, yeast breads, rolls, heck even pretzels.   I do own a bread machine, but I find that I now only break it out every few months.  I am much more opt to whip up a batch of loaf bread or apple bread.  However my current favorite, crusty bread, might now have some competition.  I love crusty bread for it's ease and super yummy crispy crust, yet the draw backs are that it takes a bunch of steps for baking AND to ensure it rises properly you need to let the dough sit for at least 4 hours.  Now the peasant bread calls for simple mixing, however there are "rising and punching" periods.  All in all I would say that this recipe, from start to eating, takes about 2.5 - 3 hours - very good when I realize I want bread with dinner and it is 3pm.

Peasant Bread

  • 4 c Flour*
  • 2 t Salt
  • 2 c Water, lukewarm **
  • 1 T Sugar
  • 2 t Dry Active Yeast
Proofed Yeast!
  1. Mix the flour and salt in a bowl and set aside. *I used all-purpose flour, however you can substitute 1/4 of the flour for whole wheat if you are so inclined.  Please keep in mind that the whole wheat flour will affect the consistency of the bread if you decide to use more.
  2. Dissolve the sugar in the water and sprinkle the yeast over the water mix.  Set aside for 10-15 minutes until the yeast is foamy.  **The best way to "proof" your yeast is to boil 1/2 c of water and add 1 1/2 c of cool water to the boiled water.  This way the water will be the perfect temperature - no fear of over heated water killing the yeast.  
  3. After the yeast foams, stir the water mixture gently and slowly mix into the flour.  Scrape the bowl sides down and mix thoroughly.  
  4. Cover the bowl with plastic wrap or a warm, damp towel*** and set aside in a warm draft-free place for 1-2 hours until the dough has doubled in size.  (***I find it is best to preheat the oven to 450 for 1-2 minutes, turn off the oven and place the dough in it's bowl with a warm damp towel in the oven for it to rise.  I do this because we always keep the fans going in our kitchen and therefore the oven is the only "draft-free" zone in the kitchen.)
  5. Butter two oven safe bowls and set aside while the dough rises.  When the dough has risen take two forks and "punch" it down, being sure to fold the dough in on itself as you scrape the sides.  
  6. Divide the dough in two and put the dough sections into the buttered bowls and set aside to allow the dough to rise for 30-60 minutes.
  7. Preheat the oven for 425 F.  When the dough has risen (almost double in size again) place the bowls directly into the oven.
  8. Bake for 10 minutes and then turn the oven down to 375 F and bake for an additional 20-30 minutes until the bread is golden brown.
  9. When you remove the bread from the oven be sure to dump it from the bowls immediately.  Allow the bread to cool for 10 minutes - if you can - before cutting.
  10. ENJOY
The bread comes out light and fluffy with a slightly crispy (not crunchy) crust.  I, of course, can never wait the requisite time for cooling before cutting into the loaf - something about freshly baked bread!  I am not going to "lose" my crusty bread recipe - these are two different types and I love them both.


The calorie count of this recipe actually surprised me.  It makes two good sized loaves.  Deciding to err on the side of caution, I divided the recipe into 20 slices (it definitely makes more slices than 20).  Keeping with the 20 slices, the bread comes in at 84 calories per slice.  Not that bad for a homemade bread!

If you are so inclined give it a try - be sure to let me know your thoughts!

Friday, November 16, 2012

Cakes, cakes and more cakes

I love making cakes (like most sweets).  They might not be perfect - as a matter of fact those that aren't used for Linc or Casey's birthdays are normally just thrown together without any thought of perfection.  Almost three years ago I made Brian a "Toad Mushroom" cake for his birthday.  Now that Linc is older he is Mario obsessed as well.  This morning he requested a "Toad Mushroom" cake for his unbirthday. (For those of you that don't know what an un-birthday is, I wish you a very merry un-birthday to you - yes you!  And yes, we have cake on unbirthdays as well as birthdays in this house :-D)

Despite not entirely wanting a wonderfully yummy cake in the house, Stink's request was made so sweetly that I couldn't turn him down.  So we set off to make a mushroom house cake - and yes I do mean WE.  Stinks has recently decided he likes helping me bake, though I am thinking it is just so he can lick the bowl and beaters when I am done - I'll take what I can get though!  Once the cake was in the oven and Stinks had the bowl for licking I made the frosting.  It's best to keep Stinks out of this step or I would have one very hyper little boy on my hands!

Finally the cake was done.  Stinks wanted to help decorate it so we set out frosting the mushroom and making it's spots.  He remembered that Daddy had a green Toad Mushroom from the pictures on our photo frame so he decided on a blue toad mushroom house that Mario and Toad could visit.  Linc is thrilled which means I am too.  And now we have a picture of Linc with his Toad Mushroom cake to put with Brian and his!

I decided that seeing I love making cakes so much I would share my gold cake recipe.  It is just a standard no frills cake recipe that is super easy and just as yummy!  (Warning:  if you were thinking you were getting a low calorie cake recipe, think again!)

Gold Cake

  • 1/2 c Vegetable Shortening
  • 1 c Sugar
  • 1 t Vanilla
  • 2 Eggs
  • 2 C Flour
  • 1 c Milk
  • 1 t Baking Powder
  • 3/4 t Baking Soda
  1. Preheat the oven to 350 F.  Prepare your pan(s) by greasing and flouring and set them aside.
  2. Cream together the shortening, sugar, vanilla, powder, soda and eggs.  
  3. Add the flour and milk alternately to the mixture.  Mix until well blended.
  4. Pour the batter into your prepared pan(s) and bake at 350 F until the cake is golden brown and a tester inserted comes out clean.
  5. Allow to cool slightly before removing from pan(s) and allow to cool completely before frosting.
  6. ENJOY
The cake recipe makes 24 cupcakes or one "character" cake.  If you are making a layer cake it will make 2 8-inch cakes for stacking.  All in all it is a great and versatile recipe.  If you want to really make a splash, divide the batter into 5 or more bowls and tint them all different colors.  Then pour the batter one by one into your prepared pan and bake.  The result will be a colorful cake that will get lots of comments!  
Once I find them, I will upload some more pictures of my previous cakes.


"Refried" Beans

As I have said before, the hubby loves all Mexican foods!  Due to this fact I find myself making Mexican inspired dishes at least twice a week - good thing I have developed a taste for them as well.   Now most foods you can just whip up at home without much fuss.  I have posted before about making your own taco seasoning - which is a staple - but I was still spending money on cans and cans of refried beans for different recipes.  Not that a can of refried beans is super expensive, but I like making my meals from scratch and therefore knowing all the ingredients I am using.

With that in mind I decided to whip up a batch of refried beans to use for the taco pizza I was making for dinner.  I have to say I am very pleased with the results.  I halved a recipe - there was NO NEED for 4 pounds of refried beans - and I thoroughly enjoy the fact that I can make them "runny" like restaurants or thick like canned!  They tasted great and the halved recipe made at least 34 (1/4c) servings - plenty to freeze for later use.  Now the refried is in ""'s due to the fact that there is no actual frying in this recipe - it is done 100% in the crockpot.

"Refried" Beans

  • 2 pounds of dry Pinto Beans, rinsed
  • 1 Onion, chopped
  • 4 T Garlic, minced
  • 2 1/2 t Salt
  • 1 t Pepper
  • 2 t Cumin
  • 10 c Warm Water
  1. Combine all the ingredients in the crockpot.  Be sure to pick out any floating beans.  Mix well and cover.
  2. Cook on high for 2 hours followed with 4 hours cooking on low.
  3. At the end of the 6 hours, remove some of the liquid (I just put a pyrex measuring cup along the side and squished the beans down to collect the liquid.  I probably removed 3-4 cups, but I retained 1 cup in case I needed to add some back).  
  4. Mash the beans to the consistency of your choice - adding back some liquid if desired.  
  5. ENJOY
Could it be any simpler than that?!  The recipe makes 16-17 cups, depending on the liquid used.  It isn't calorically healthier than canned beans - let's face it beans aren't the lowest calorie food.  It is however homemade!!  The amount of liquid I left gave me 34 servings which equaled about 90 calories per serving - same as the leading canned refried beans.  I have now stocked my freezer and will be able to just grab a bag the next time I want to make tacos, dip, or anything calling for refried beans!

(I will post a picture of the beans the next time we eat them as a side - with all the toppings you can't really see them in the taco pizza picture.)

The point I would like to stress is the money saving with this recipe.  The onion, water, and seasonings are all things I keep in house and therefore weren't an expense.  The beans I got on sale for $1/lb.  Therefore for 34 servings of beans I paid $2.  Even if we add in the expense of the seasonings and onion - lets say another $1 for those quantities (I am rounding UP) - I would have still only paid $3 for 34 servings.  That is a total of $0.09/serving.  The leading canned refried bean goes for about $1.25 - but let's say I got it on sale for $1.  There are 4 servings per can, that is $0.25/serving (on sale).  OK so I know that a savings of $0.14/serving isn't that much but think about it in terms of totals.  For $3 I can make 34 servings of HOMEMADE refried beans or I can buy 12 servings of CANNED refried beans. What are your thoughts?

Tuesday, November 13, 2012

White Hot Chocolate

YUM - that is all I have to say.  I don't drink coffee and I am not the biggest tea fan so my warm drinks normally consist of hot chocolate.  Now if you are thinking this is going to be a low calorie option I am sorry to disappoint you.  This white hot chocolate is over 200 calories a mug - but oh so delicious.  Let's face it, sometimes you just need that high calorie "feel good" cup of yum.

White Hot Chocolate
  • 2 c Milk
  • 1/2 c White Chocolate Wafers
  • 1 t Vanilla
  1. Heat milk and vanilla in a pot over medium heat.  
  2. Just as it starts to steam, add chocolate wafers and stir till dissolved. 
  3. Froth up the top and pour into two mugs.
  4. ENJOY!! 

Monday, November 12, 2012

Zucchini Bites

Think pizza bites but greener :-D  These little tots are yummy - husband approved - and super easy to make.  I threw them together to have with our pizza tonight.  The best part is you can add or remove what you want from the recipe.  The only "grain" they contain is bread crumbs, so they aren't as "doughy" as the pizza bites.  Experiment and make them into what you want!

Zucchini Bites

  • 1 c Zucchini, shredded and drained
  • 1/4 c Cheese, shredded (I used a mix of Parmesan and Cheddar)
  • 1/4 c Bread Crumbs
  • 1/4 c Onion, diced
  • 1 egg
  • Seasonings of your choice - I used some Italian and Garlic (my go to spices)
  1. Preheat the oven to 400 F.  (I was cooking a pizza at 450 and threw these in with it - worked fine.)  Prepare a mini muffin tin by coating it with non-stick spray.
  2. Mix all the ingredients together and spoon into your mini muffin tin
  3. Cook until golden brown and the edges are crispy (about 10 - 15 minutes).  
  4. ENJOY
See, super easy!  My suggestions are simple 1. Be sure to squeeze the excess water from your zucchini!! You will have soggy bites if you don't.  2. If you like that crispy crust - once they reach a golden brown color pop the broiler on for a minute or two.  3.  Be sure to let them sit for a few minutes before you pop them in your mouth, burnt tongues are no fun :-D.

The recipe above makes 12 bites at 27 calories per bite - not bad for a nice snack.  They are super filling.  So I would say you could eat the whole batch for a mere 324 calories, but I don't think you would make it through the whole batch!

Try them out and let me know your variations!

Friday, November 9, 2012

Easy Homemade Noodles

I LOVE pasta.  I would say it comes in second to bread in my food loves.  I could easily eat it every day, but that wouldn't be all that good for my journey.  I have recently decided that if I have to limit my intake of favorite foods then I am DEFINITELY going to go all out and get the best tasting for the caloric intake.

Now I have made pasta before to mixed results. I am an impatient person - like you couldn't tell that - and due to my impatience waiting for pasta to dry before I can eat it doesn't always work out for me.  I enjoy recipes I can create and then enjoy!  This recipe is not only easy but gives you the option of cooking/eating right away or drying for later consumption.  Plus it is SUPER easy, even if you don't have a pasta cutter or roller.

Easy Homemade Noodles

  • 2 1/4 c Flour
  • 1/2 t Salt
  • 1/3 c Water
  • 2 Egg Yolks
  • 1 Egg, whole
  • 1 t Oil
  • Extra flour for dusting
  1. In a large bowl combine the flour and salt.  Create a well in the center of the mixture.
  2. In a small bowl beat together the water, oil, egg yolks and egg.  Pour the mixture into the well and mix together until a dough is formed.
  3. Now comes the elbow grease - knead the dough for a good 8-10 minutes until it is nice and elastic.  Cover the dough and set aside for 10 minutes.
  4. After the 10 minutes, divide the dough into 4 pieces.  **If you don't want to make the full amount of noodles at this time you can wrap the dough in parchment and seal in an air tight container and freeze the dough.  I decided to freeze three of the sections for another time.**
  5. Roll your pieces out on a lightly floured surface until it is about a 9 x 12 rectangle.  Lightly dust both sides of the dough and set aside for 20 minutes.
  6. After the 20 minutes is up, loosely roll the dough lengthwise and cut the spiraled dough crosswise into 1/4 inch strips.  Unroll the strips and cut each length into 2-3 inch sections.
  7. At this time you can either cook the noodles immediately or dry them for storing.  
    1. If you are going to cook your noodles, place a pot of water to boil on the stove.  Once the water has reached a boil, slowly add the noodles a few at a time - to ensure the water continues to boil.  Stir occasionally.  Homemade noodles only take 2-3 minutes to cook in boiling water.  Be sure not to over cook or they may become mush.
    2. If you are going to dry for storage place your noodles on a wire cooling rack and set aside. If you are planning on using the noodles in the next three days they can be stored in the fridge - dry them on the rack for about 2 hours and place in an air tight container in the refrigerator.  If you aren't planning on using the noodles in the next three days you should store them in the freezer - dry on the rack for about an hour and then transfer to an air tight container for the freezer.  
  8. ENJOY!
Now for the nutrition facts.  One quarter of the dough - like I used - creates about 7-8 ounces of cooked noodles.  Seeing I was eating the noodles for lunch, I settled on a small bowl of 4oz to go with my meal - if I was eating it for dinner I would probably have eaten the entire 6-8 ounces.  That being said I decided to divide the recipe into 4 servings.  So 1/4 of the dough is roughly 300 calories.  For my lunch today I cut that in half and had 4 oz of cooked noodles for 150 calories.  (Barilla linguine comes in at about 200 calories for 2oz - just to give you a comparison.)

The good thing about these noodles is that they don't need to be soaked in butter, sauce or pesto to taste great.  For lunch I simply added a couple teaspoons of freshly grated parmesan cheese - WONDERFUL.


You can also use this recipe to make ravioli - try making chocolate ravioli, it is yummy!  Give it a try, I promise you will make it again and again.

Thursday, November 8, 2012

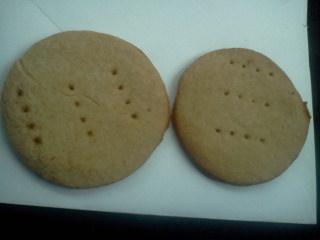
Graham Crackers

This past summer I went on a "homemade s'more" kick.  I was determined to make a s'more with all homemade ingredients.  The marshmallows were not a big deal, I had made then before and could duplicate the recipe with complete success.

So, with one third of the recipe down I moved my sites onto the remaining two ingredients.  I have always wanted to make my own chocolate - from that very first trip through Hershey's World - isn't that the best smelling ride you have ever been on?  To do this I need to get my hands on some cocoa beans and then set aside an entire day to the process.  I am hopefully going to do this at some point this winter.

Finally the graham crackers.  There is nothing worse than eating a s'more on a stale or overly sugary graham cracker.  I feel that the marshmallow and chocolate should be the main taste of a s'more with the graham cracker simply being a sturdy vessel that provides a graham flavored crunch.  Have you ever had "Old Fashioned" graham crackers?  They aren't sugar filled, the graham flour is the most apparent.  They have a dash of honey and a wonderful crunch.  That is what I was after - and I am proud to say I succeeded.

Graham Crackers

  • 1 1/2 c All Purpose Flour
  • 1 1/3 c Graham Flour
  • 1 t Baking Soda
  • 1/2 t Salt
  • 1 c Butter or Margarine, softened
  • 2/3 c Brown Sugar
  • 3 T Honey
  1. Cream together the honey, butter, salt, soda and sugar.  Slowly add in the flours and mix until a dough forms.
  2. Remove the dough from bowl and play on parchment or wax paper.  Flatten into an inch thick square and refrigerate for at least 2 hours.  (You should be able to refrigerate the dough for a few days.)
  3. After chilling the dough, remove from the fridge and set on a floured workspace.  
  4. Preheat the oven to 350 F and lightly grease your cookie sheets.  (You can line the sheets with parchment paper if you prefer.)
  5. Roll the dough to about 1/8 inch thickness and cut out your "crackers".  
  6. Transfer your dough crackers to the prepared sheets.  Be sure to "score" the crackers with a fork for an authentic look.  Back for 10-15 minutes or under the crackers are a golden brown color and are firm.
  7. Remove crackers from sheet to cool.  They will "crunch-up" as they cool.
  8. Enjoy
It should be noted that these crackers are NOT sugary.  If you were looking for the cinnamon-sugar flavored crackers that is a different recipe entirely (which I will share at a later point).  Please also keep in mind that I did not grind down my graham flour, thus your will have a graham texture in the cookie - something I like yet might not be enjoyed by all.

I cut my crackers into 1.5 inch circles, the recipe made 58 crackers.  I can't wait to try these again in the spring time when I can roast a marshmallow and, hopefully, include some homemade chocolate!

Calorie wise they are what you would expect - 50 calories per cracker (if you make 58 crackers)!

I, again, forgot to take pictures so I will update later with some better ones.

Shout out to my Aunt for taking a picture and texting it to me!

Wednesday, November 7, 2012

Quick Realizations

As I was logging into MFP today I realized something - Brian and I have lost over 75 pounds as a couple.  That blows my mind!

As I am wont to do I feel the need to say thank you.  Being on this journey is difficult enough without having to keep it to myself.  Being able to share the experience and be proud of one another has seriously helped.  Way to go Brian!  I think we are doing great and we can keep moving forward!!

Stinks and I "cheesing" - it seemed appropriate for a happy realization :-D

Tuesday, November 6, 2012

Mini

Recently we had the good fortune to get our hands on an iPad Mini.  I have heard many many arguments for and against the mini and I decided to take a moment to explain my stance.

As I am sure you are all aware I am an Apple Fan-girl.  The products just work for me.  It all started in 2001 when I purchased by first iBook and instantly fell in love.  That iBook still works, fyi - even after being hit by a car, We crack it out every now and then for Stinks.  Now being married to developer means having all the main operating systems in our house at all times.  I can't even keep track of what system is on what computer anymore - which is fine as long as he leaves my computer alone!  

It also means we are a family that likes technology.  Yes, our three year old has an iPad.  It is blue and he will tell you all about it if you ask him.  This is the future people.  More and more things are leaning towards Passbook-like functions.  Our children will need to know this technology in and out in order to effectively navigate their world - we are just giving Stinks a fighting chance :-D.  

Keeping with our technology hungry appetite we enjoy learning and playing with all the new gadgets.  This past weekend we visited the Microsoft store to check out a Surface.  (You don't want to know my opinion on that - but I am about as anti-Microsoft as a business person can be.)  Of course once we were done in the Microsoft store we took a hop skip and a jump right on over to the Apple store.  

Enter the iPad Mini.  

I have to say I LOVE my iPad (3rd generation, named Kinsei).  I use it daily - mostly to read, check email and browse, but it is still a daily use.  Every once in a while I wish that my iPad was just a bit smaller.  The mini fulfills all my wants.  It is the perfect "book" size for reading.  It is the perfect size for stashing away in my bag.  The screen is gorgeous, crisp and clear.  The camera is fast and nice - though I have to say I am not one of those people that will walk around with my iPad to take pictures!  I love the new adapter - I don't use docks for my iPads though so I am not sure how I would feel if I needed adapters.  

I have to say that my main reason for wanting the mini was for reading.  I do own a nook color, but I am not that big of a fan.  The nook is HORRIBLE for browsing and the apps are slow.  I read a LOT - at least a book a day.  I enjoy being able to hope between my book and a search engine when the whim hits me.  The nook makes this virtually impossible, thus the main reason for me switching to Kinsei for my reading pleasure.  (I do occasionally read "real" books, however due to my reading habit I have run out of room for actual books and have moved onto virtual.)  As I said early I do LOVE Kinsei, but my new mini (named Freyberg - or Small Frey*) is the PERFECT reading size.  The switch between virtual books and browsing or other apps is quick and effortless. 

Now I know that most of you are thinking "if you love your big iPad so much why would you spend the money on a smaller one?"  I will point you back up to the beginning of the blog where I said we are a technology hungry family.  I will continue to use Kinsei and well as Small Frey and be perfectly happy and content with both of them.  I am very happy to have Small Frey for those traveling days when bringing a bigger iPad is just not feasible.  All in all I am thrilled!  (Bring on the scorn...)

*I needed to explain the names of my apple products.  I name every apple product, with the exception of my iPod touch, after apple types.  So far the names have been Gala, Crispin, Pippin, Red (delicious), Jazz, Kinsei, Keswick, and Freyberg.  Look them up!  They are all apple types trust me.  

Monday, November 5, 2012

Going to the dogs...

I can't believe this is the first post about Selphie Fi Beaglemation!!  I proudly introduce you to our princess - Selph.  I am sure I have mentioned her before, and some of you might be surprised to discover she is our dog.  She is a part of our family, not just a pet.  If you have never had the pleasure of living with a dog then you won't understand when I say that she really does make the days brighter.  She is lovely and faithful and just the best dog ever!  She is our little girl.  Stinks even calls her his sister - yes I know people think that is strange but like I said, she is part of the family.

Selph came to us as a rescue from Ohio.  She was put on a "Puppy Trail" and traveled across the states to meet up with me on my birthday 8 years ago.  She was so tiny and adorable we just fell in love immediately.  Despite her original claim to be a beagle, Selph is now the wonderfully protective and faithful 120 pound dog we love.  (Needless to say she is NOT a beagle :-D)

Now seeing she is such an important part of our family we do like to spoil her just as much as we spoil the Stinks.  We normally make her a homemade treat for her birthdays.  Her first birthday we even through a party - don't worry it was just us and her we didn't send out invites or anything like that.  This past year I decided to make her some peanut butter treats - cause have you met a dog that doesn't LOVE peanut butter?

PB Oat Balls for Dogs

  • 1/2 c Milk
  • 1 c Peanut Butter
  • 3 c Oats
  1. Mix the milk and peanut butter together until creamy.  
  2. Slowly add in the oats until all incorporated.
  3. Roll into balls and place in a sealed container in the refrigerator.  
  4. Feed them to your puppy and watch their enjoyment!
I know that the recipe says for dogs, however they are obviously made with ingredients safe for humans as well.  I have tasted them - cause I taste everything I make for her, I am weird remember?  They aren't that bad, though if I was going to make them for human consumption I would most likely add some honey or agave for sweetness.  I have added carob to these before (if you add anything in you might need to adjust the milk to make them stick better) as a special treat for Selph.  She does seem to love them, but again - they contain peanut butter so why wouldn't she?!  They last for a good month in the fridge - if you can make it to the month mark, and they are freezable.

If you are a pet loving person like we are, give them a whirl for your dog.  In the meantime here are a bunch of pictures of our lady - isn't she gorgeous?!
The birthday girl turns 8.  She was relaxing on her big day!

"Did you hear that?!"

No worries - she was just playing here :-D
(don't mind the crazy amount of dog hair either - she sheds like CRAZY
when playing!)


Even Selph has a sophisticated palate.  She LOVES seafood -
sushi included!

Sunday, November 4, 2012

Cheeseburger Soup

Earlier this year we had taken a trip up to North Conway - like we are wont to do a ever three months or so.  This trip we stopped in at the Scarecrow Pub.  We were all very skeptical at first, but it turned into a great stop.  While we were deciding what to order the waitress informed us that the soup of the day was cheeseburger.  I was intrigued.  After years and years of eating nothing but chicken noodle I had recently developed a taste for soups.  A bowl was ordered and it was fantastic!  Every once in a while I will come across another cheeseburger soup - none have really stood up to that first taste.  So, like always, I set out to make a version of my own.

Cheeseburger Soup

  • 1 lb Ground Beef
  • 1 Onion
  • 2 Celery Stalks
  • 2 Carrots
  • Basil, to taste
  • Parsley, to taste
  • 4 1/2 c Water
  • 4 Chicken Bouillon Cubes
  • 2-3 Potatoes, cubed
  • 3/4 c Milk
  • 3 T Margarine or Butter
  • 1/4 c Flour
  • 2 c Shredded Cheese (I used a mix of cheddar and monterey jack)
  1. Spray a large pot with non-stick spray and add beef, onion, celery, carrots, basil and parsley.  Cook until beef is browned and veggies are softened.  (If you are using high fat concentrated ground beef be sure to drain the fat out of the pot before proceeding.)
  2. Add the water, potatoes and bouillon cubes to the meat and veggie mixture and bring to a boil.
  3. Reduce heat and simmer for 10-15 minutes or until the potatoes are tender. 
  4. While the soup is simmering melt the butter.  Mix the flour into the melted butter. 
  5. Once the potatoes are tender mix the butter/flour mixture into the soup and bring to a boil.  
  6. Reduce heat and simmer for about 5 minutes.  Slowly stir in the milk and simmer again for another 5-10 minutes.
  7. Slowly stir in shredded cheese, mixing until it is melted.  Remove from heat and set aside for 5-10 minutes.  
  8. ENJOY
My recipe made about 11 cups.  (I think it actually made more like 12, but I ran out of room in my container so Selph got the left overs - and greatly enjoyed them!)  I also need to mention that all the recipes I had found online during my research called for sour cream to be mixed in as well.  In a soup recipe this size I would say 1/4 - 1/3 of a cup of sour cream would be about right.  I didn't have any sour cream in the house - not to mention I am not a fan - so therefore my soup doesn't have any in this time around.  I will probably add some next time just to see if it makes a difference.

Calorie wise, the soup isn't all that bad considering the ingredients.  For a one cup serving you are looking at about 190-195 calories.  I had a cup along with a salad the other night and it filled me right up.  I do think that the soup needs to be eaten with some crackers or bread - but that might just be me.  What do you think?

*Apparently I completely spaced on taking pictures - sorry.  I will take/upload some soon!

Friday, November 2, 2012

Mini Banana Chip Muffins

Per the Stinks request I set out to make mini muffins today.  In true Stinkles fashion, however, when they were completely he had moved on and wanted nothing to do with them.  It is not a review of the muffins that made him turn his nose up, it is his three year old attention span!

After the calorie intensive PB&J muffins from the other day I decided to swing the other way and make a low calorie mini muffin.  I think these are a success!  Of course if you don't like banana's, this is NOT the recipe for you.  I, however, love banana bread and therefore really like this recipe!

Mini Banana Chip Muffins

  • 1 c Flour
  • 1 c Banana, mashed (about 3 medium bananas)
  • 1 T Baking Powder
  • 1/2 t Baking Soda
  • 1/4 c Sugar
  • 1/4 c Unsweetened Applesauce
  • 1 Egg
  • 1/2 t Vanilla 
  • Chocolate Chips (optional but add that extra something)
  1. Preheat the oven to 350 F and grease your mini muffin tins.  (These can be made into regular muffins as well, but Stinks hardly ever finishes a full size muffin so I stuck with mini muffins.)
  2. Mix together the sugar, mashed bananas, applesauce, vanilla and egg.
  3. Mix in the powder, soda, and flour.
  4. Finally mix in the chocolate morsels.  (You will notice in the picture that I used white chocolate pieces - again at the little one's request!)
  5. Scoop a tablespoon of batter into each mini muffin cup.  (Be sure to only fill them 3/4 of the way or they will spread too much.)
  6. Bake until the muffins are set and a tester inserted in the center comes out clean.  (Be sure to cook until the sides start to brown - I removed my mini muffins a little early.  They still taste good, but I think they would have been even better if the side browned up nicely.)
  7. Allow to cool for about 10 minutes before removing the muffins from the tin.  
  8. ENJOY!
As this is my first time making these muffins I wasn't sure how many the recipe made.  It turns out that I made 24 mini muffins (though I overflowed about 14 of them so I could have easily had 30 mini muffins) and 2 regular muffins.  Taking that into account, I would say the recipe makes about 35 mini muffins or 12-14 regular muffins.  If you are making mini muffins, the calorie count comes in at about 35 calories per muffin.  If you are making regular muffins the count comes in at about 90 calories per muffin.  In either case I am pleased!  (If you want to omit the chocolate morsels - I used about 1/4 of a cup - then the calories come in at 26/mini muffin and 70/regular muffin!)

UPDATE:
I am just writing to say that these muffins are now a staple in our house.  I no longer make them mini - Brian and I prefer the normal muffin size.  They don't puff up as much as "normal" muffins, but they aren't nearly as calorie intensive so I am ok with this!  I can normally make about 18 muffins (I sometimes use 4 bananas and have been known not to measure all that well) which brings the calorie count to about 80 calories per muffin.  (I also use egg beaters.)


Let me know if you try them - I always like feedback!

Greek Yogurt Pizza Crust

Pinterest is a great time suck.  I mean that in the best possible way!  I, personally, love it - but it is a time suck.  The biggest problem with pinterest is determining if a recipe or craft is actually "doable" based on the information provided.  A greek yogurt pizza crust is just the type of recipe I am talking about.  Now I know that you can use greek yogurt in place oil in some recipes, but the possibility of adding yogurt to flour and creating a "yummy" pizza crust was something I couldn't wrap my head around.  I put it on the back burner.  

I recently started thinking about the pizza crust concept again when I had to purchase self rising flour for a different recipe.  I figured if the pizza crust was going to be anywhere near edible, self rising flour would be the one to use!  And so I set out to try and keep enough greek yogurt in the house to make a pizza crust!  (Between Brian eating it all, and only having mango or pineapple flavor that was an adventure in itself.)

Greek Yogurt Pizza Crust
  • 1 c Plain Greek Yogurt
  • 1 - 1 1/4 c Self Rising Flour
  1. Preheat the oven to 400 F
  2. Mix the flour into the greek yogurt.  Knead for 5 minutes.  If the dough is too sticky add a little more flour.
  3. Roll out on a pizza stone, top with toppings of your choice and bake until crust is golden brown.  
  4. Enjoy!
I have to admit I was very skeptical about the crust's taste.  All in all I am impressed.  The crust bubbled up nicely and lost that "bitter" taste from the greek yogurt.  I apologize for the pictures.  I sort of threw the dough together and in my skepticism I wasn't all that careful in preparation!  I also didn't add all the wonderful toppings we normally use on pizza - didn't want to waste the veggies in case it was a horrific disaster!  I have to say that with all the normal toppings this pizza will be all sorts of delicious.  

Calorie wise the crust isn't all that bad.  I cut the pizza into eight slices which would leave the calorie count at about 65-70 calories per slice (just for the crust).  As is in the picture, with sauce and cheese, the pizza came to about 80 calories per slice - not bad at ALL for pizza!!

  
Next time I will make sure to roll it out evenly!