Friday, September 28, 2012

Homemade Oreos

WARNING: Serving this recipe will result in continuous requests to be filled. Bake at your own risk.

Oreos are probably one of the only store bought cookies that I will eat.  So obviously I have been on the lookout for a homemade version for years.  I have come across many close recipes, yet none of them could ever duplicate the filling.  This past June I hit the jackpot.  The filling recipe is spot on, in my opinion, and the cookies are quite yummy - I had to make a few changes to the cookie recipe to ensure that the dough wasn't too sticky to manipulate.  I make them larger, and therefore softer, than store bough oreos.  If you want that crisp cookie you just have to use a cookie press as opposed to hand rolling the cookies.

Since discovering this recipe I have made these cookies for practically every major party.  They aren't super in-depth, however they do take longer to make than a simply batch of toll house.  Try them and let me know what you think.

Oreos
Cookie Dough

  • 1 1/2 c Flour
  • 1/2 c Cocoa
  • 1 t Baking Soda
  • 1/4 t Baking Powder
  • 1 1/2 c Sugar
  • 1/2 c + 2 T Margarine (softened)
  • 1 Egg


  1. Preheat oven to 375 F
  2. Lightly grease cookie sheets
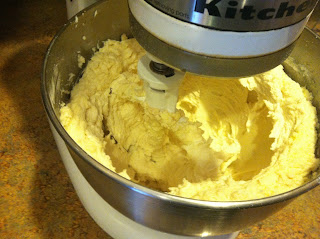
  3. Cream together sugar, margarine, and egg.  Add remaining ingredients slowly.
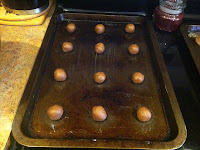
  4. Roll dough into small balls and place on cookie sheet.  Flatten balls.
  5. Bake until cookies start to crack.  Remove from oven, allow to cool slightly before moving to a cooling rack.


Filling
  • 1/4 c Margarine (soft)
  • 1/4 c Shortening
  • 2 c Powdered Sugar
  • 2 t Vanilla
  1. Cream together all ingredients.  
  2. Add filling to the one half of the cookies.  Place top on cookies and try not to eat them all!
Sorry about the crappy picture!!  These are double stuffed as well.
Nutritional Information:  The recipe makes about 24 sandwich cookies when hand rolled or 48 sandwich cookies when using the cookie press.  They are 174 calories per cookie when hand rolled and 100 calories per cookie from the press.


Wednesday, September 26, 2012

The Green Monster


Fenway Park


Seriously, did you get chills?  I know I am a giant tomboy (do people still use that word or have they moved on to jockette yet?), but there is just something about going to that park and watching a game.  Now if you are a true Red Sox fan - a LOYAL fan, then you haven't jumped ship for the Birds to the south just because the Sox are sucking it up this season.  I was raised a Sox girl, I will die a Sox girl; through the good and the bad I will still root for good old Red Sox - be them Pawtucket or Boston.

Speaking of old (you like that segue?), Fenway Park celebrated 100 years this year.  Call me crazy, but that ceremony teared me up.  In the past few years I have spent more time at McCoy than Fenway.  Let's face it, I can see about 12 games at McCoy for the price of one (decent seat) at Fenway.  This year McCoy was the place to be actually, seeing most of the major league team did a rehab rotation there anyway :-D.  Forgetting all of that, Fenway just has that feeling to it.  Brian and I were lucky enough to be given Loge Box tickets for a recent Sox/Orioles game.  From the moment we got out of the car, a half a mile from the park, I had a grin splitting my face.  I am a HUGE baseball fan - you know, one of those people that will yell at the TV, listen to EVERY GAME, and spew statistics.  Fenway is the holy grail to my kind.  Even with the Sox doing so poorly this season I was jazzed to be there.  The park itself is gorgeous to me.  I have been to Camden yards (before I am asked), it is ok - but it is no Fenway.  Our seats ended up being right at first, the night was gorgeous, the Hood Blimp was present and I only had half a beer spilled on me.  If you are a baseball fan you will understand the allure.  Even if you aren't a Sox fan, you have to give it to us; our park is great.


Any one else out there a Sox fan?  I love arguing or just discussing - and this season there is a LOT to discuss!!

I leave you with some wonderful pictures of our visit...


Monday, September 24, 2012

MyMushroomRing.com

As you may already know, I have decided to claim my domain name in the hopes of spending more time on my blog.  MyMushroomRing.com is now my new home - though you will notice is looks a LOT like blogger :-D  I haven't quite figured out what I want to do with the space.  Actually that is completely false, I know what I want I just don't know how to do it.  Having a husband that can (and is willing) to make whatever I want is a blessing and a curse.  I want to KNOW how to do it, not just give him a crazily drawn picture of how I want the site to look and let him work his magic.  (Cause let's face it people - we all know Brian is magic and anything he made would looks 100 time better than anything I drew on our white board!!)

The site will probably be moving in slow (I am talking turtle slow) steps towards what I see in my mind.  In the meantime I will continue to use blogger (or perhaps wordpress) for my random spewings of thought.

I leave you with a fun mushroom ring - which makes me realize I have never actually tackled the lore of "fairy rings" in my blog.  Ah, but that is for another day...


Sunday, September 23, 2012

Cinnamon Wreath

Cinnamon Wreath.  Doesn't that just sound like a winter-time wonder?  Of course, being the crazy person I am, I made this recipe for the first time in the middle of summer.  The name might throw some of your - in my opinion it should be called Cinnamon BUN Wreath.  It is SUPER easy to make - a wonderful in-house recipe - and leaves you with a final product that looks (and smells) like you spent HOURS working to achieve.

Cinnamon Wreath
Dough

  • 2 c flour
  • 1/2 t salt
  • 1/2 c lukewarm water
  • 1 envelope dry active yeast
  • 2 T butter, melted (I use margarine)
  • 1 egg yolk
  • 1 T sugar
Filling

  • 4 T butter, softened (again I use margarine)
  • 4-5 T sugar
  • 3 t cinnamon
Glaze (optional)
  • 3 c Confectioner's Sugar
  • 3 T Milk
  • 1 t Vanilla
  • 1/4 c Butter or Margarine, softened
  1. To make the dough - combine the sugar, yeast and water in a bowl.  Set aside until bubbling.  Once yeast mixture is ready, add egg yolk, flour, salt and butter to mixture.  Mix/knead till dough ball is formed.  Place dough ball in a greased bowl and cover with cling wrap.  Place bowl in a warm spot to allow dough to double in size (about an hour).  
  2. Preheat oven to 400 F (I normally place bowl on the oven while it is preheating.)  While dough is rising, melt the butter for the filling and mix in the sugar and cinnamon.  Set aside.
  3. Once dough has double in size, turn out the dough ball on a lightly floured surface.  
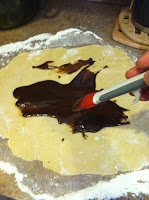
  4. Roll flat and spread the butter mixture over the top.  (you want to make sure your butter mixture isn't too runny, which is why I melt and mix right after setting the dough aside, so the melted butter has time to cool down and coagulate again.)
  5. Once the entire surface is covered, roll up the dough lengthwise and use a knife to cut it down the center.
  6. Braid the two halves around each other.  Form the braided rope into a circle.
  7. Place the wreath onto a lightly greased baking sheet (I use my stone).
  8. Bake in a 400F oven for 30-35 minutes until golden brown.  Once the wreath starts to brown, reduce the oven to 350F for 10-15 minutes until golden to ensure it doesn't burn.
  9. You can top your wreath with icing (powdered sugar and water), powdered sugar, glaze or just eat as is.  


 You will see in my pictures that I rolled my dough the wrong way, so my wreath is on the smaller side prior to cooking and very bulky after cooking.

The nutritional content of the wreath is :
1549 Calories

27 Protein

227 Carbs
47 Fat

This way you can divide it up into however many sections you want!!

I will update more pictures the next time I make one - I promise to pay attention to my baking the next time!!


UPDATE:

Tis the season for APPLES!!  Blueberry bars were not an option this morning due to a significant lack of blueberries (seriously how did I let my supply dwindle to 1/4 of a cup?!); therefore I needed to think of a replacement for Casey's birthday extravaganza - CINNAMON WREATH!!!  Seeing it was a gorgeously fall feeling day when I woke up this morning I decided to tweak the recipe a little to include that fall feeling.  Add the apples!  I peeled and diced ONE apple and added it to the filling mixture.  It smells WONDERFUL and I cannot wait to taste it.  If you are joining the festivities you will be able to tell me your opinion, if not - try it yourself!

Diced apple added into the filling - looks yummy!

Don't mind the old and well loved cookie sheet - this is the second wreath I made today and my stone was dirty.


Chai Tea Mix

I am not a coffee drinker.  I am not a tea drinker.  As a mater of fact that only warm beverages I will (normally) drink are hot chocolate and steamed milk - which, of course, I add ice cubes to to make them cooler for consumption.  Brian, on the other hand, is a grand connoisseur of all warm beverages.  He needs coffee; he drinks teas, hot chocolates, and pretty much anything that you could think of that would come out of a Starbucks :-D

I had noticed time and again that Brian would go through vanilla chai cravings (whether is be a warm tea, frozen tea, or just a Bolthouse).  We had purchased all the different mixes/brews to try and find the perfect make-at-home taste.  Seeing Brian is fairly easy going - he never really complained about any of them, nor did he rave about one either.  I decided to research creating my own chai mix in the hopes we could use it for the many different chai flavored drinks (not to mention cakes and goodies recipes I have accumulated that require chai).

Thus, Chai Tea Mix was born.  It is not the normal in-house friendly recipe.  I had to make sure I wrote the four main ingredients on my shopping list in order to make this mix, however I have been told by many that it is worth it.  (Perhaps one of these days I should try it.)  The recipe is SIMPLE and if you like Chai I am thinking it will become a staple.

Chai Tea Mix
1 c Dry Milk Powder (I used carnation non-fat)
1 c Non Dairy Creamer (I used light)
1 c Non Dairy French Vanilla Creamer (again I used light)
2 1/2 c Sugar
1 1/2 c Instant UNSWEETENED Tea (no lemon flavoring!!!!)
2 t Cinnamon
2 t Ginger
1 t Cloves
1 t Nutmeg


  1. Combine all the ingredients in a large bowl and whisk together.
  2. Transfer the mix, in portions, to a food processor (or in my case magic bullet) and grind until it is a fine powder.  Grind all of the mix to the find powder.
  3. Store in an air tight container


To create a nice warm cup of chai tea you mix one tablespoon of powder to one cup of water.  Here in this house we are not so big on measuring so we eye ball everything - I say find where your taste preference is and do that!

*One serving (1 T of mix) = 28 calories, 0 fat, 0 protein, and 6 carbs.  This batch makes about 114 servings.

As always, if you try it let me know what you think!


Wednesday, September 19, 2012

The quest for low cal (yummy) baked goods

I LOVE baking.  It is relaxing and comforting to me.  Seeing I am refusing to completely stop baking to conform with my new calorie counting ways, I have been on the look out for low cal/ low fat baked goods that would fit well into the plan.  Perhaps I am asking too much, there are a million recipes out there that are low cal, but they use BOX mixes - not something that I condone.  I prefer to make all my baked goods from scratch.  

I have discovered that the key to the low cal/low fat recipes are sugar and flour substitutes.  Enter the Chocolate Chunk Muffins.  I have been stock piling sugar substitutes like Stevia and agave syrup for use in these recipes so today I decided to try the muffins out.  

Chocolate Chunk Muffins
1 3/4 cups Oats
3/4 c Cocoa
3 Egg Whites
1/2 c Unsweetened Applesauce
1 t Vanilla Extract
1/2 c Plain Yogurt (you can use greek or non fat) 
1/2 t Cream of Tartar
1 1/2 t Baking Powder
1 1/2 t Baking Soda
1 c Hot Water
1/4 c + 2T Stevia (or 1c Sugar Substitute such as Splenda)
1/2 c Chocolate Morsels 

  1. Preheat oven to 350.  Prepare 2 12-cup muffin tins
  2. Add all ingredients, save chocolate morsels, into a blender and blend till oats are finely chopped
  3. Mix in chocolate morsels by hand
  4. Pour into muffin tins
  5. Bake till tops slightly crack and muffin tops spring back
The recipe is pretty good, yet I still have a problem with the Stevia.  Sugar substitutes (all of them) leave a nasty after taste in my mouth.  The muffins are good, but I can't get away from that after taste.  I suppose I can deal with this batch seeing if you make 24 small muffins they are only 58 calories a piece, and if you make 12 muffins they are 116 cals, but I doubt I will be making them again.  Anyone have any suggestions for low cal HOMEMADE baked goods?  I am thinking I will just continue with my original plan, normal baked goods in MODERATION!


UPDATE:
I let the muffins sit for a couple of days (ever notice that a chocolate cake is so much better the day AFTER it was made?) and I have noticed that the bitter after-taste is less apparent.  Also they peel from the wrappers a lot easier - so I guess all in all this wasn't the complete failure I thought it was!  

One month review...

As I am sure you all know by now, Brian and I have started a weight loss challenge in our house.  We are trying to make it a "lifestyle change" (cliche I know but, hey, whatever works).  In leu of paying an organized company (i.e. WeightWatchers etc) we settled on goals and rewards of our own.  It worked.

I was very very skeptical in the beginning, thinking that if I didn't have the constant EXTERNAL accountability I wouldn't follow through.  To that end I begged family members to keep me on track.  (I think my sister was looking forward to keeping me in a line I little too much - I am happy to say she hasn't even had the need to speak to me once except for encouragement!)  I even bribed, cajoled, asked a cousin (whom will remain anonymous on here until they inform me that it is ok to use their name :-D) to join MFP with me and that helps even more.  I opened up my food diary so my "MFP friends" (Brian and said cousin) can see what I am eating and keep me accountable that way - because seriously who would eat a half a batch of cookie dough knowing that people would see it?

In addition to counting our calories, Brian and I have started a semi exercise routine.  We walk.  Which I am sure some of you will be laughing at but let's put this into perspective:  we might have run around the house like crazies with Linc, but when he went to bed we would normally sit on the couch and watch a movie - consuming a giant bowl of popcorn.  Now we walk on the treadmill while watching said movie - at least we are moving!  We both do at least a mile a day (normally more like 3-4).  We aren't "power walking", but we try to keep it in the 3-4 mph range.  It is working!  My feet don't hurt nearly as much anymore (just the occasional plantar fascia issue) and I have noticed that I am craving that time on the treadmill.  Take for instance this past weekend - we had spent the entire day walking around Storyland - granted it had been a leisurely pace of probably about 2 mph but we calculated that we had done at least 3 miles up and down hills.  When we got back to the condo that night I surprised everyone by saying I was off to the gym.  I craved the feeling you get from knowing that you worked up a sweat (reminds me of high school sports - hell week was just that HELL, but boy did it feel good at the end of a practice knowing you gave it your all.)  A quick jog on the treadmill that night and I was content.

Onto the progress:  I joined MFP and started seriously tracking my calories/exercise one month ago - August 19th.  MFP allows you to track calories, carbs/sugars, protein, fat, sodium, the list goes on and on.  Though I hate to admit it, I normally only look at the calories, fat, sugar and sodium.  I have found that I have no problem keeping the calories, sodium and fat under goal, but I regularly overshoot the sugars by about 10 - probably not the best thing with my genes but I will worry about that when I am told to worry about it.  I am proud to say that Brian and I have both lost over 5% of our body weight!  OK so 5% might not seem like a big deal, but I am super proud of us!  In the month since starting this journey I am down 16.2 lbs.  I know it is unrealistic to think that it will continue in this vein, but I am happy with where I/we am/are going and the route taken to get there.

Side note:  I am truly enjoying MFP - and do recommend it to anyone out there that is looking to count calories.  The database is huge, it allows you to input recipes (big in my book), the tickers are neat, and it gives you a community to remind yourself that you are not the only one doing this.

Monday, September 10, 2012

Chicken Pot Pie SOUP

There really is nothing like a good chicken pot pie.  I am partial to homemade pot pies (shocking I know), however Willow Tree, Lucky's and Davenport's all know how to make good pies if you are strapped on time.  Seeing I am not a huge fan of pie crust (though I am always in the mood for the wonderful flakiness of Lucky's crust - seriously if you are in the Seekonk/East Providence area you need to stop in and try their pot pie) this pot pie soup recipe seemed just the thing for me.  I couldn't wait to try it.  As a matter of fact, it jumped right to the top of the "to try" list and thus was simmering away on the stove this very afternoon.

The recipe is very simple, although I do have a disclaimer:  The chicken is precooked.  For me this is not an issue, seeing I have a tendency to boil up some chicken at the beginning of the week for salads and what have you.  (Of course it is very easy to just poach some chicken in boiling water.)

Chicken Pot Pie Soup


  • 1 lb chicken breast, cooked and chopped
  • 1/4 c flour
  • 2 c water
  • 4 c milk
  • 1 stalk of celery
  • 1 small onion
  • 2 chicken bouillon cubes
  • 1 bag frozen veggies (of your choice, I used mixed corn, peas, carrots, green beans and lima beans.  I also added a cup of broccoli seeing broccoli makes everything better :-D)
  • 2 medium potatoes, peeled and cubed
  • salt and pepper to taste
  1. Make a slurry with the flour and 1/4 cup of the water.
  2. Combine the remaining water, milk, and bouillon in a pan.  Bring to a rolling boil.
  3. Reduce heat and add all the veggies.  Bring to a rolling boil again, then reduce heat to simmer until veggies are softened.
  4. Add potatoes.  Cook until tender.
  5. Add chicken
  6. Stir in slurry, mix well
  7. Season with salt and pepper to taste
  8. ENJOY

The recipe made about 6 servings of 1 1/2 cups.  Each serving is 244 calories - not bad, it is very filling!  I also made some wonderful crusty bread (how have I never blogged about the crusty bread?!) to accompany the soup.  (Brian requested a bread bowl, but I didn't even want to CONTEMPLATE the amount of calories that would be so I put him off for a little bit.)  If you are a fan of pot pie then I say give this a try!  It really was wonderful.  (Don't mind the super large chunks of chicken in the picture- that will teach me to be lazy and not cut down my chicken.  Check out that wonderfully yummy crusty bread!!)


Friday, September 7, 2012

Lettuce Wraps


These are the BEST HOMEMADE LETTUCE WRAPS I have ever made!  They taste very much like PF Changs.  I honestly don't think I will ever look for another lettuce wrap recipe they are that good!

This morning when I woke up I was thinking "Japanese food would be wonderful for dinner".  Thus came the search for the hibachi soup.  Once that was settled on I turned my attention to the main course, and though they have more of a Thai taste, lettuce wraps won out.

I have made many a lettuce wrap over the past few years.  Always looking for that one recipe that would rival PF Changs yumminess, yet be homemade and a little lighter. (PF Changs lettuce wraps, to me at least, seem to sit heavy in my stomach.)  I have noted a recipe for working with a few months ago, so I dug it up and started tinkering.  The result was spectacular. Exactly what I was looking for, PF Chang's taste without the heavy feeling.  These will definitely become a regular rotation meal.

*As I like to say with all my recipes, this one is made with materials I always have in the house.  I am starring this statement because I am sure not every household out there stocks sesame oil, rice vinegar, water chestnuts and fresh bean sprouts.  We just happen to - the rest of the ingredients are kitchen staples however.

I will apologize now, I only have pictures of the finished product because I was preoccupied while prepping and forgot to take pictures.  Let's blame Stinks :-D

Lettuce Wraps

  • 1 lb of chicken, ground (you can grind your own or just buy ground chicken)
  • 1/2 onion, minced
  • 2 cloves garlic
  • 1/4 - 3/4 t ginger (depends on your preference)
  • 1 T sesame oil
  • 2 1/2 T soy sauce
  • 1/2 T water
  • 1 T smooth peanut butter
  • 1/2 T honey
  • 1 T + 1 t rice vinegar
  • 3 scallions, chopped
  • 4 oz water chestnuts, chopped
  • 2 oz mushrooms, chopped
  • 1 carrot, chopped
  • 7 oz bean sprouts (I just throw them in until it looks like enough, same with the chestnuts and mushrooms)
  • Large lettuce leaves for wraps
  1. Brown chicken with onion, garlic and ginger.  Keep chicken in skillet on low heat.
  2. Combine sesame oil, soy sauce, water, peanut butter, honey and rice vinegar in a microwave safe dish. (You can omit the water if you want.)  Microwave for about 1 minute to melt peanut butter and mix well.
  3. Add mixture to chicken and mix to coat well.
  4. Add scallions, water chestnuts, mushrooms, and carrot.  Cook until scallions are soft.  (This step I made last for a while seeing I over estimated the time needed to prep and I was waiting for Brian to get home.  It was on low heat for about 10 minutes, not harm done.)
  5. Remove from heat and toss in bean sprouts.  Mix to coat.
  6. Serve with lettuce leaves
  7. ENJOY
The recipe claims to make 2-3 servings.  I settled on three for 399 calories a serving.  At full disclosure I could not eat all of my third.  I made it through about 3/4's of it before I was too full to contemplate anymore.  (Keep in mind I also had a serving of hibachi soup - yet wasn't able to finish that either. Lettuce wraps, hibachi soup, and a cup of watermelon makes for a very filling meal!)

I have decided that I am going to skip the lettuce leaf with the left overs. Instead I will add a freshly chopped cucumber to the meat mixture for crunch.  (We all know my love of cucumbers and willingness to put them in EVERYTHING.)
If you try them, let me know what you think!

Hibachi Soup

OH DEAR GOODNESS THIS IS GOOD!

Alright, now that I have that out of my system I can tell you about the soup.  Ever been to a Japanese steak restaurant and sat at the tepanyaki tables?  You know how they bring you a little bowl of salad with wonderfully yummy ginger dressing (which we will tackle in another post seeing I have a few recipes for that as well) and that oh so yummy soup?  Calling it soup might be a bit of a stretch.  It is normally a nice small bowl of broth with some mushrooms, scallions and french fried onions.  It has both beefy and chicken flavorings that is all underscored with just the right amount of ginger.

Now some restaurants do this soup to perfection (Sakura Tokyo in Worcester, MA) and some have a just OK recipe (Osaka falls into this category for me).  I have been trying to perfect this recipe since the very first time Brian brought me to Sakura; and I realized that I spent 18 years of my life saying I didn't like a food genre that I, in fact, LOVE.  I have tried mixes (I know, I know), I have tried cans from specialty stores, heck I have even gone so far as to order it different places in the hopes of getting something CLOSE to Sakura's.

THE SEARCH IS OVER.
Today I made Hibachi Soup - a recipe that I of course found on Pinterest.  (Perhaps one of these days I should blog about my horrible horrible Pinterest obsession.)  Right from the very beginning I knew this one would be different.  Not only does it have been and chicken bouillon, but it also has celery, carrots and garlic - all of which are flavors that I could pick out in the soup even if they weren't present.  (I always chalked that up to a veggie broth but I was wrong.)  This is the easiest recipe ever.  Throw everything into a pot and basically walk away.  I am thinking that I will experiment with making it in the crockpot - I will keep you posted.  Let me tell you it is a dead ringer for Sakura's soup - I am thrilled!

Hibachi Soup

  • 1 stalk Celery
  • 2 medium Carrots
  • 1 small Onion
  • 4 oz sliced Mushrooms (I didn't have fresh on hand so I used canned)
  • 3 cloves Garlic
  • 5 Beef Bouillon Cubes*
  • 4 Chicken Bouillon Cubes*
  • 9 cups Water
  • Ginger per discretion  (I didn't have fresh so I used powdered.  I used 3/4 of a teaspoon)
  • French's Fried Onions 
  • Scallions
  • Salt and Pepper
These are instructions based on how I prepared the soup, the recipe calls for different veggie preparation.  I will explain after.  (* The original recipe called for 2.5 tablespoons of chicken bouillon granules and 3 tablespoons of beef bouillon granules.  That was just TOO MUCH for me to handle - I am thinking it would have been WAY to salty.  Therefore I scaled back to the 4 and 5 cubes respectively.  1 bouillon cube = 1 teaspoon of granules   3 bouillon cubes = 1 tablespoon of granules)

  1. Wash, peel, slice (onion), and chop all the veggies and garlic.  Place in pot.
  2. Add ginger.
  3. Add 9 cups of water.
  4. Bring the soup to a rolling boil
  5. Reduce heat and simmer for at least 45 minutes.  You can let it sit longer, just be sure to replenish evaporating water of the soup will be very salty.
  6. When ready to serve, garnish each bowl with a tablespoon of French's Fried Onions and some scallions.  

The recipe makes about 8-9 cups of soup.  Each serving is 1.5 cups.  That is a total of 37 calories per serving of soup!  Let me say that again - THIRTY-SEVEN calories per ONE AND A HALF CUPS of YUMMINESS!  (It is a good thing you guys know I am crazy or this probably would have tipped the scales :-D)

Now earlier I had explained that those were my instructions and not the recipe's.  The recipe calls for all the same ingredients (save the scallions) and a very similar process.  The main exception is that the original recipe does not want you to chop all veggies into nice small pieces.  As a matter of fact, it says to cut the celery and carrots in half as well as the onion.  It does this because you are supposed to strain the vegetables out of the soup prior to serving - and just garnish with fried onions.  As I read the recipe I said to myself: What a waste.  All those wonderful vegetables gave the soup it's great taste - plus if I keep them in it will be more filling.  So I broke from the recipe and made my hibachi soup into hibachi VEGGIE FILLED soup.  

If you like the soup served at Sakura (or your choice of Japanese Steak House) then please try this.  It is wonderfully delicious, smells great while cooking and is EASY!  Plus, like all the recipes I tend to favor, it is made with kitchen staples.  No weird ingredients here.   If you try it, let me know what you think.  

Thursday, September 6, 2012

CrockPot Chicken Fajitas


We are big fans of Tex Mex / Mexican cuisine in this house.  I honestly think, and have been told by the man himself, that Brian could eat from said genre every day and be blissfully happy.  (Personally I would take a pizza or a pasta dish every day, but to each their own.)  Of course there are the super chain restaurants, such as Chili's and On the Border, were you can get your mexican craving whetted with super large meals that may or may not taste authentically yummy.  Brian and I stumbled onto a very yummy place named Jalisco in Putnam, CT.  It is now our go-to mexican restaurant: they are quick, they are clean, they like Linc, and the food is wonderful! (My absolutely favorite mexican restaurant has to be this little hole in the wall that Brian and I found on Maui.  IT WAS DELICIOUS!!) All this being said, mexican cuisine is not exactly the lowest calorie food out there.  Between the tortillas, cheese and wonderful wonderful avocados (I have been on a HUGE avocado kick for weeks now - I will eat them in/with ANYTHING), you are looking at one very high caloric meal.

Which brings us to this recipe.  I stumbled upon it while I was wasting timeignoring work, quickly perusing Pinterest the other day. I am not always a fan of crockpot recipes, but who out there can tell me that the allure of throwing everything for a meal into one pot isn't a strong one?  I also noticed that to cook the chicken, the recipe uses chicken broth - no more skillets full of butter here!  Plus the recipe uses ingredients that the house is always stocked with, which is a BIG thing for me... I hate having to go to the store for that one ingredient I only use for one recipe.  It doesn't cut the calories of all the extras (i.e.: tortillas, cheese, guac), but it is a quick and easy meal and it tastes good.  (Plus, I have taken to eating fajitas without any wraps and just a small amount of cheese added - so I guess now they aren't fajitas just a skillet of meat and veggies.)

The recipe is simple, what you see above is what you use (with the exception of lime juice - I apparently forgot to put it in the picture).  I think in the future I will play with the spices a little, I am not that huge a fan of cumin and you could definitely taste it in this one.  I added more veggies than the recipe called for, but that is cause I LOVE peppers and onions.  The original recipe came from here.  This is my version of it:

CrockPot Chicken Fajitas
  • 1 lbs Chicken Breast - skinned, trimmed and cut into 1 inch thick strips
  • 2 Medium Onions
  • 3 Peppers
  • 2 T Chili Powder
  • 1 t Cumin
  • 1/2 cup Chicken Broth
  • 2 T Lime Juice
  • Salt and Pepper 
  1. Place the trimmed and stripped chicken in the bottom of your crock pot
  2. Peel and slice an onion and scatter on top of chicken.
  3. Slice peppers and scatter on top of onion and chicken
  4. Slice remaining onion and scatter on top again
  5. Pour lime juice over veggies and chicken
  6. In a small bowl mix together broth, chili powder and cumin.  Pour the mixture of the meat and veggies.
  7. Set your crock pot to 3-4 hours on high or 6-7 hours on low (I cooked on low).
  8. Enjoy!


See what I mean- SIMPLE.  The chicken was very moist and the veggies were not.  I think I would cut back the amount of broth used next time (maybe in half).  For a first try, however, these were pretty good.  I paired mine with two Coco Lite crisps (some people say they taste like cardboard but I LOVE these fun 16 calorie crisps - especially with toppings) and a 1/4 cup of mexican cheese. The recipe made three servings at 284 calories a serving.  It was MORE than enough to fill me up for dinner - I probably could have turned it into 4 servings!  


Progress

Just under 11lbs in just under 4 weeks! I feel good about this. Keeping the momentum going. Sorry if I am driving you all batty with calorie counts!!

Update:  so apparently I can't read a calendar.  It has been brought my attention that I started on this whole calorie counting/portion control/exercise journey on August 19th - not just under 4 weeks ago, 18 days ago.  2 weeks and 4 days.  I am sure I won't keep up this pace, but wow I am feeling good right now!!

Wednesday, September 5, 2012

Lasagna Roll Ups

So I know I have been overloading with food posts, but come on - some of them are darn yummy!!  I know that tomorrow Linc and I will be having a later night, which means prepping and cooking dinner when I get home would result in eating at 9-10pm.  That just won't work!  Keeping that in mind I decided to prepare Lasagna Roll Ups today for baking tomorrow.  (I am very sorry for anyone whose sensibilities are bothered by this, but a girl has to do what a girl has to do.)

Brian has always been a fan of lasagna, yet now that I am doing the calorie counting I was worried that one piece would wipe me out for the day - and do I really want all my calories going to a food I consider just OK?  Imagine my surprise when I put the recipe into my builder and came out with a wonderfully low number of 195 calories per roll up!!  This recipe was definitely doable, and if it's a hit, it will most likely become a staple.  Pasta is one of my favorite foods, second actually only to bread (I know right?!).  That being said I HATE the lasagna making process.  Boil the noodles, mix the cheeses, make the meat sauce, layer layer layer.  I normally only do it for special occasions and then only under duress.  (Poor Brian, I guess I am not a very nice wife.)  I was skeptical that the roll ups would be any better of a process - wouldn't it be more time consuming and a bigger pain?  I am happy to say that I actually enjoyed making these roll ups.  Not only did I NOT burn my fingers on lasagna noodles (a common happening when making layer lasagna), but rolling them was FUN.  (Ok we all know I am a little crazy so just go with it :-D)  I also love the fact that one roll up is a serving - no more trying to cut perfect pieces and losing half the filling when taking said piece out of the pan.  All in all the prep for the lasagna roll ups was fine - I still had to cook the noodles and prepare the meat and cheese, but I got to spread out the noodles and "paint" on the cheese and meat.  FUN!

Here is the recipe and some pictures.  I will update once we have eaten them to let you know the consensus on Roll Ups vs Layered.

Lasagna Roll Ups

  • 1/2 lbs Lean Ground Beef (I used 97/3)
  • 1 T Minced Onion
  • 1 T Garlic Powder  (You can use fresh - I just had none on hand)
  • 2 cans Diced Tomatoes (I used Hunt's regular)
  • 1 Large Egg
  • 16 oz Ricotta Cheese (I use part skim)
  • 1/4 cup Parmesan Cheese *
  • 3/4 cup Mozzarella Cheese *
  • 3/4 cup Pasta Sauce 
  • Parsley (I used fresh, but spice parsley is fine)
  • 1lb box of Lasagna Noodles
  1. Boil noodles according to package.
  2. Brown beef with onion and garlic.
  3. Drain beef.  Transfer portions of drained beef to a food processor (I use my magic bullet) and pulse to finely grind beef.  (You do NOT need to do this part, however it does make the meat sauce easier to spread.  You could also put it through a meat grinder, however it is only 1/2 a pound and my magic bullet is a LOT easier to clean than my grinder.)
  4. Add the tomatoes to the beef.  (I dumped a can into my magic bullet to purée it - just cause I am not a fan of huge tomato chunks.)
  5. When noodles are done, drain and lay out on wax paper.
  6. Combine ricotta cheese, parmesan cheese, 1/4 cup of mozzarella cheese, egg and parsley in a bowl.  Mix until blended well.
  7. Place a spoonful of the cheese mixture on each noodle.  Spread the mixture to cover the noodle.
  8. Spoon some meat sauce onto each noodle and spread. 
  9. Place 1/4 cup of pasta sauce in the bottom of your baking dish.
  10. Roll up the noodles as you would a jelly roll and place them on the sauce seam side down
  11. Top the rolls with remaining pasta sauce and mozzarella cheese.
  12. Bake at 350 until cheese is melted and sauce is bubbly.
As you can tell from the pictures, a pound of lasagna noodles makes a LOT of roll ups. (Makes me wonder seeing normally a pound of noodles goes into ONE lasagna - obviously there is a lot more noodle than needed there.) I made 18.  There is NO WAY we were going to eat 18 roll ups so I divided the roll ups between two dishes and froze one for a later date. (Instant dinner on a night when I am just not feeling like cooking!) Because I laid the noodles on wax paper clean up (from rolling) was a cinch, just roll the paper up and throw away.  We will see if they past the taste test - it is looking good from my end though!!

UPDATE:  Now that Brian and I have actually eaten the roll ups I have come back to update everyone as promised.  Brian said they were "good" (which is his standard answer so he really wasn't much help there).  We both agreed that the roll ups were a LOT easier to serve and to know the serving size!  The taste was very good - however, I think the next time I make them I will have to add another 1/4 cup of pasta sauce.  They were a little cheesy without tomato sauce to counter it for my tastes - and Brian is always a fan of more sauce so that should be "good" as well.  All in all I would say they are a hit!  (Of course not such a hit that Mr. Picky Stinky would even consider THINKING about trying them.  Seriously where does he get that pickiness from? - says the girl that ate beef in the form of filet mignon ONLY until she was 20.)  I am thinking this will definitely be my go-to lasagna set up from now on!!  Even with the extra sauce we are still looking at under 200 calories a piece - definitely a wonderful meal!